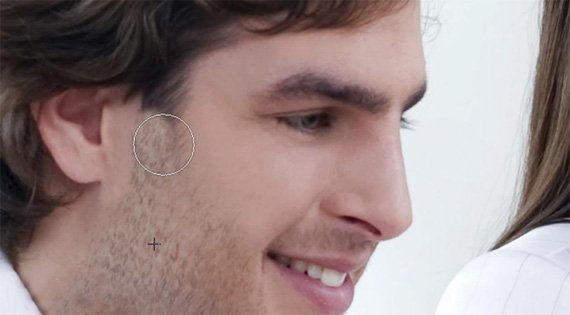
Blemishes, such as scars, pimples, and acne are often visible in portraits. You may want to keep them, but if not, we’ll show you just how easy it is to remove them.
Of course, it’s better to prevent blemishes with clever lighting or camera tricks than rely on photo editing. For example, you could try a diffusion filter to smooth over and mask blemishes when you take the photo.

How to Remove Blemishes on Portraits
However, with the photo editing software that’s available today, the simplest and most inexpensive way to deal with blemishes is by healing, cloning, or in some cases, both.
Healing
The healing tool is found in most photo editors and provides a very simple, and ultimately rewarding technique for repairing flaws in portrait photography.
It works by blending a blemish with a texture that you choose from elsewhere in your photo. The photo editing software picks up the color and brightness values of this texture and merges them with those of the original blemish.
The subtlety of this tool is what makes it perfect, not only for small areas such as pimples and scars, but for larger and more prevalent features too like wrinkles, where colors and textures are high in contrast.
Your chosen texture isn’t just pasted straight over the top of the problem area, but it’s blended with the surrounding pixels in the portrait, thus creating a seamless, unnoticeable result.
One important thing to remember when using a healing tool is that different areas of the face vary considerably. For example, the skin on the forehead differs greatly in its color and texture when compared with the skin around the eyes.
Try to choose replacement textures from as close to the blemish as you can; this keeps your touch-ups as realistic as possible.
Cloning
Tools that enable you to clone parts of an image are also common in photo editors and, as with healing tools, they make professional results easy to achieve.
However, whereas healing tools blend two textures together, cloning tools simply copy and paste a chosen area of your portrait over a problem area.
The cloning tool is ideal for small fixes such as pimples or even for larger areas which are low in detail. On the other hand, more intricate problems are better left to a healing tool. Tackling such issues by cloning usually results in changes which are noticeable rather than blending into the photo.
Lines will be visible where the edges of the cloned area join the underlying photo. This can be reduced to some extent, by using a soft brush which creates some blurring between the two areas.
But cloning is best used for small fixes or for larger, plain areas. And it’s important, no matter where you use it, to pick various parts of the portrait as your source. This reduces the likelihood of creating immediately noticeable, repeated patterns which is inevitable if you clone the same texture over and over again.
Healing + Cloning = Optimum Results
As you can see, there are instances where each of these tools performs admirably and there’s no cast-iron rule to say which is better.
In fact, the best results are often achieved when healing and cloning are used together. Just keep in mind that moderation is the key; that way, you correct the blemish, but you retain natural skin tones and avoid a plastic, airbrushed feel.
About the Author:
Peter White is employed by Serif, a leading developer of software for home and small business use. Serif sells a range of software for photo editing, which includes PhotoPlus, a feature rich photo editing software package and PhotoPlus Starter Edition, a free photo editing software suite for novices.
Like This Article?
Don't Miss The Next One!
Join over 100,000 photographers of all experience levels who receive our free photography tips and articles to stay current:


1,2,3 quick move…..How about some advance stuff though? I love King Midas’s work! (Bianca Carosio). Could you please post her website as that alone is an incredible sampler!!
great tutorial thanks…