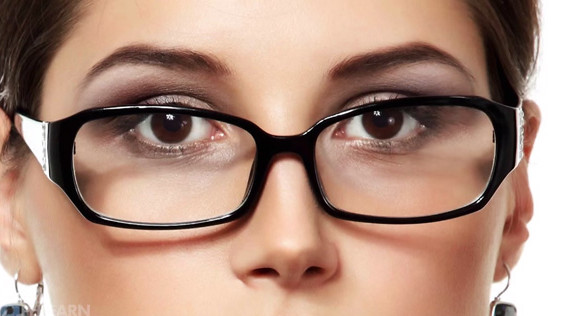
As we all know, modern photography is as much about capturing the perfect moment as it is about touching up that moment to turn it into a perfect photo. One of the most common of these post-processing edits is removing the glare from a subject’s glasses—a minor detail that’s difficult to avoid when shooting, and one that only takes a couple of minutes to improve. Phlearn’s Aaron Nace has a great tutorial on removing glasses’ glare:
The method Nace teaches will take a steady hand and previous Photoshop knowledge, but with just a bit of practice and patience it can be a very effective way of improving a picture. You’ll take an image with an obvious flaw and turn it into a stunner.

Original Image. Notice an obvious glare near the subject’s left eye.
Removing Glare from Glasses in Photoshop
1. Make sure one of the eyes is clear and doesn’t have any reflection. You’ll use the image from one eye to help correct the other.
2. Open the Clone Source window (Window > Clone Source). On the Clone Source window select Show Overlay in order to see what point is being sampled. Also, in the same window click the click the Flip Horizontal option located on the left of the width slider to flip the width of the source that’s being cloned.
3. Select the Clone Stamp Tool (shortcut S) and use it to paint from one eye of the subject to the other, using the eye that is not obscured by the glare as the source.
4. Use a Layer Mask to obscure any parts of the cloned outcome that don’t actually need cloning—the parts that are outside of the actual glare.
5. Use the Clone Stamp Tool again to fine tune your picture. At the end, use a 50% opacity to blend the newly added sections of the image and make the whole area look uniform.

Ater. The glare has been completely removed.
Do you have other methods for removing glasses glare? Share them in the comments below!
Like This Article?
Don't Miss The Next One!
Join over 100,000 photographers of all experience levels who receive our free photography tips and articles to stay current:


Where can I find a sample price list for what a retoucher charges for certain things…such as glass glare?
Thanks so much!