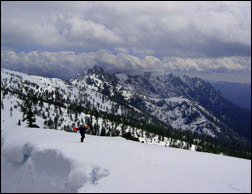
Before Changes
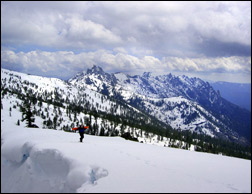
After Changes
This tutorial is to help you learn how to adjust landscape photos to bring out the detail of the background and horizon. Much of the time a digital camera will bring out the colors more in the foreground, but with this tutorial you can learn how to emphasize the whole scene. Ok, once you have your picture open in photoshop:
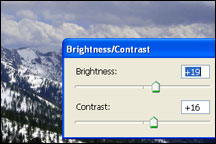
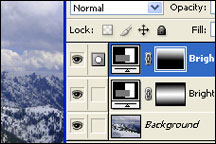
1. First of all, create a New Brightness/Contrast Adjustment Layer (Layer>New Adjustment Layer>Brightness/Contrast). Adjust the Brightness and Contrast until the Background looks good, don’t worry about the Foreground. For this photo I set the Brightness to 19 and the Contrast to 14.
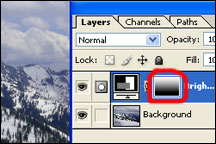
2. Then Select the Gradient Tool (G) and choose the kind called the Reflected Gradient. Then with the Adjustment Layer mask selected, drag the gradient tool from the top of the photo to a little past halfway in the photo.
3. Then for this photo, I repeated steps one and two but used the Gradient to only include the clouds and sky to bring out more detail in the sky.
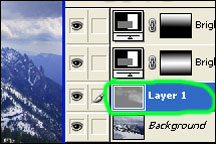
4. Then Create a New Layer (Layer>New>Layer) and when the New Layer Dialog box comes up Choose Overlay from the Mode drop menu, and Then check the box that says, “Fill with Overlay-neutral color (50% gray)”
5. Then Choose and big soft paintbrush and To Brighten Areas: with the color white carefully stroke your paintbrush on the Overlay layer that you created. And To Darken Areas: with the color black carefully stroke your paintbrush on the Overlay layer that you created. For more Instruction on Steps 4 and 5 please refer to our tutorial on “Professional Brightening Techniques.”
With this technique you can make any regular landscape photo look very professional. And each step is completely customizable to work with different photos. For different photos, the process and amount of adjustment won’t be exactly the same.
For further training on professional photo editing:
- Understanding Post-Processing – a practical guide to post-processing of photographs in Adobe Lightroom and Photoshop.
- Super Photo Editing Skills – get the skills you need to quickly and easily bring the best out of your photos in Lightroom.
- Photo Nuts and Post – a guide to getting started in post-processing.
Like This Article?
Don't Miss The Next One!
Join over 100,000 photographers of all experience levels who receive our free photography tips and articles to stay current:




Leave a Reply