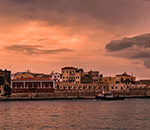
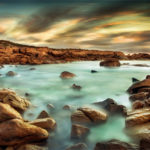
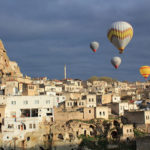
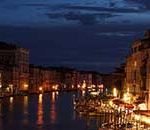
Most travelers like to bring home pictures to remember their trip. If you’re looking for a way to turn so-so snapshots to fabulous photos, take a moment to review these tips.
 Before You Leave
Make sure you’re familiar with how your camera works. If you haven’t read the manual, do it. You may find that your camera has capabilities you didn’t know about, or you may find answers to questions that have been bothering you.
If you have enough gear to warrant a camera bag, try to find one that doesn’t scream, “I’m a camera bag. Steal me!” You may want to consider a backpack-like style because they’re easy to carry around all day, leave your hands free, and appear relatively inconspicuous.
When you pack for your trip, bring your manual, extra camera batteries or a battery charger, and digital storage cards or film for your camera. If you plan on taking lots of digital photos and you have a laptop, it may be a wise idea to bring it so you can download your images and reuse your cards.
For air travel, pack your camera in a carry-on bag, especially if you’re fortunate enough to own sophisticated equipment. Even locked, checked luggage can be broken into, and if your equipment is stolen, most airlines will not reimburse you. Avoid putting your camera in a jacket pocket, too, since it’s easy to leave a jacket on the plane or in the airport. Before you exit the plane, double-check to make sure you have all your things.
Camera Settings
Your camera’s automatic settings control the f-stop and shutter speed for you. The f-stop determines how blurry the background looks. The smaller the number (like 5.6), the more the background blurs. The larger the number (like 16), the sharper everything in the picture is. Neither one is inherently better than the other; it all depends on what you’re photographing and what effect you want.
Shutter speed refers to how quickly the camera’s shutter opens and closes. The higher the shutter speed, the faster it takes the picture. To freeze action, you need to shoot at a minimum of 125. Below 60, you need a tripod to keep the image sharp because your hand will move enough to affect the picture.
Point-and-shoot cameras may not allow you to adjust both settings yourself. However, understanding your camera’s automatic settings can help you control how your photos look. For instance, portrait settings are designed to keep the main subject sharp and blur the background, while landscape settings keep everything sharp. Shoot a variety of subjects on each of your camera’s settings to see what they do and what you like.
Some cameras have semi-automatic settings which allow you to set either the f-stop or the shutter speed yourself, while the camera sets the other one. These are often ideal: you still have a good amount of control over how your image looks, but you don’t have to worry about meter-reading or quickly changing light conditions.
If you can change your camera’s settings, you should know about ISO speeds. They control how much light your camera or film needs to take an image. Low numbers like 100 work in bright daylight, while higher numbers like 400 are for cloudy days or possibly indoors. The lower the ISO number, the more detail your photos will have, so set it at the lowest number you can.
 Composition and Subject Matter
The number one thing you can do to improve your photography is good composition. Camera manuals used to say that you should place your subject in the middle. This was because viewfinders showed more than would end up in your picture, but it usually looks boring.
Instead, imagine three equally-spaced lines running across your image both horizontally and vertically. The places where the lines meet are the strongest areas to place your subject. You don’t need to draw lines on your viewfinder to do this, however, just practice putting your subjects off-center. Try taking a few shots from different angles. After a while you’ll get the hang of it.
It’s a good idea to shoot slightly more than you want in the picture, because when you get prints, your images may end up getting cropped to fit the print sizes. If you have photo editing software, you can crop it yourself to the right size so that it looks best. Don’t go over board with the extra space, though, because printing a small portion of a larger image will result in poor quality.
Landscapes help capture the feeling of a place, but too often they fall flat. Having something in the foreground will jazz up your landscapes. A lone fisherman on the lake in front of majestic mountains not only adds interest to the shot, it shows just how huge the mountains actually are. Leading lines are good in any image, and even more so in landscapes. What are they? Things like roads, fences, or a line of trees which begin in the foreground and lead the viewer’s eye to the background.
Of course, when you’re traveling you also want to see people in the locations. There’s nothing wrong with photographing your companions by a famous landmark, but remember to use creative composition. Another great way to break out of the “people standing in a line in front of a monument” snapshot is by taking candid pictures. You’ll also get more genuine expressions that way.
Generally, the more your subject fills the frame, the better. That’s especially true for people and animals. You probably don’t care about your companion’s vacation wardrobe; what’s important is their face. If your camera doesn’t have a zoom lens, you’ll be more limited in how tight a shot you can get. Pay attention to what’s going on in the background. You don’t want a stop sign sticking out of someone’s head.
Photographing local people can help tell a story about the place you’re visiting, especially if you’re in an exotic destination. However, many people find it rude to be photographed without permission. If you know that’s the case or if someone looks upset about you pointing your camera at them, ask if it’s okay to take their picture. A little flattery may be helpful, and some may even ask for money. Don’t push it if they say no.
Remember, interesting photo opportunities are everywhere. A bustling market, a cityscape, details of an object or building, a roadside food shack, or a lizard sunning himself can all make great shots. And while everyone prefers to remember their travels as pleasant experiences, few places are completely idyllic. You may encounter poverty, industrial areas, or locations damaged by natural disasters, war, or terrorism on your trip. Although such subjects aren’t the cheeriest, they can yield powerful images that make a statement.
With a little practice, your own photos may look just as good as the postcards.
About the Author
Karen Joslin writes for Anguilla-Guide.info, Bermuda-Guide.info, and other Segisys travel Web sites.
Like This Article?
Don't Miss The Next One!
Join over 100,000 photographers of all experience levels who receive our free photography tips and articles to stay current:


Leave a Reply