Be a sharp shooter and don’t shake your camera. Have you sometimes looked at those wonderful coffee table books or maybe at some photo websites and asked yourself, “How can the pictures be so sharp? Is it some kind of digital trickery? Why can’t my pictures be so crystal clear?”

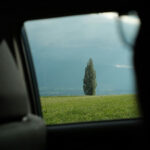
Photo by Pascal Kahle; ISO 100, f/5.0, 1/200s, 49mm.
This is what I saw the other day. I was walking through the park near my home. A young man was taking a photo of his wife and child. He had taken out his camera and he’d clearly done some thinking. First of all, they were not out there in the bright sunshine where they would have black sockets for their eyes but they were in the open shade under a tree in front of the lake. Good idea.
Then the man had squatted down on his haunches to take the photo. He didn’t want to be looking down on his wife and little girl. Also a good idea.
And then, the next thing he did was compose the picture on the screen of his camera which he held out right in front of him at the end of his arms. No, no, no! I wanted to go up to him and say, “Please don’t do this.” Anyway, he got up, the three of them looked at the screen, they seemed pleased and off they went.
I’m pretty confident that if that family wanted an enlarged picture it wouldn’t be very big before it looked pretty blurred. Maybe they’ll think they need a new camera. I’m sure it’s obvious. You simply can’t hold a small and light camera right out with your outstretched arms while balancing on your heels and expect it not to shake and quiver like a leaf in the wind. And that’s the basis of camera shake. So, what can you do?
Hold your camera steady
Quite often when you want to take a photo you know the viewpoint’s very important. You may be in the middle of a field. If so, you must be the support for your camera. You must stand, or kneel, but make yourself a really solid base. Stand with your feet apart. You must hold the camera as steady as you can—certainly not waving it around with one hand. If you can, bring the camera to your eye if it has a viewfinder. If you have a strap, you can wrap the strap around your neck and use it keep the camera steady. And when the time comes to actually take the photograph, remember to press the shutter release very, very gently. If you jerk it, you will shake the camera.

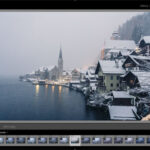
Photo by zooK2; ISO 200, f/5.6, 1/1600-second exposure.
Take several photos of the same subject
If your subject isn’t changing all the time, take several photos—10 or so—at the same settings. You’ll find that one or two are sharper than the others.
Use a fast shutter speed
If your shutter speed is too slow the shake will show. It’s not easy to judge with modern digital cameras but the old photographers’ rule might help you.
Always use a shutter speed related to the focal length of the lens.
For a 50mm lens use a minimum of 1/50 second. For a 300mm lens use a minimum of 1/300 second. Get the picture? Long lenses will magnify the shake.
Find a support
As I said, viewpoint is very important but perhaps you can change your viewpoint a little bit. If you don’t have a tripod, look around you and you might see a tree, a wall, a bench, a table, a lamp post, something that’s absolutely solid, unmoving, unshaking.
If something like this is in the right the place, then use it to brace your camera. When you do this, make sure the camera itself makes contact. In other words, if you’re using the branch of a tree, hold the camera on the tree branch directly, not just your hand or your arm but the camera itself. This will make the camera rock solid.
Of course, you might find that the horizon is not quite straight or something of that kind. You can change this by moving the camera a little bit or using your hand to help, though that’s not ideal. You can correct it in post-processing.
Use the self-timer
If you have a solid support like a wall, and you have the exact viewpoint you want, you can use the self-timer. The self-timer is normally used to take pictures of yourself but if you switch the self-timer on and press the shutter release gently there will be a delay of a few seconds before the shutter fires. This will kill any vibration or camera shake.

Photo by Clark & Kim Kays; ISO 100, f/5.0
Use these techniques and your pictures should be sharper. If you want to be more sophisticated you will have to take some more equipment to support your camera. But that’s for another day.
About the Author:
Hi. I’m John Rocha (johnrochaphoto). I’m a British photographer based in Sofia in Bulgaria. Most of my work now involves rights managed and royalty-free stock photography. I’ve made the transition from the darkroom to the lightroom in the last few years but I still experiment with film and non-camera photography.
Like This Article?
Don't Miss The Next One!
Join over 100,000 photographers of all experience levels who receive our free photography tips and articles to stay current:


Another thought is to always exhale upon pressing the shutter button…it’s a proven method in any number of areas, from photography to athletics. Exhaling calms and steadies the hand.
Great article. The few other tips people can use are:
– use your camera’s mirror lockup. while this does help, the drawback is your need your camera on a tripod
– turn off your IS/VR/image stabilization – if you are using a tripod.
– find the sharpest aperture in your lens. All lenses have a sweet spot.
I made a video on the 7 tips I use for very sharp photos. Not for all shooting conditions, but useful nevertheless.
https://youtu.be/p9EcAdqZexc
good article, important points, in which I fully agree.
only the foll. one I would not suggest …
You write: “Of course, you might find that the horizon is not quite straight or something of that kind. … You can correct it later in a computer if you use one.”
When rotating the picture afterwards in Lightroom / Photoshop you will always lose sharpness.
Thanks for sharing these great tips.Sometimes I just want to walk & shoot and not carry a tripod. This will help.
Hi
I’m glad some readers have found this article useful.
There’s a reason more points aren’t covered.
This is only one of the articles I’ve written on taken sharp pictures.
You can read all I’ve written so far by going from my website to the articles I publish on ezinearticles.com.
My plan is to publish these eventual with illustrations as part of an ebook or series of ebooks.
If you want to keep informed you could subscribe to the RSS feed on my site.
I really appreciate your comments and interest.
John
I’m pretty surprised there was no mention of depth of field and where to aim the autofocus. I’ve ruined many otherwise great shots by using a too wide aperture and focusing on the wrong part of the target.
Good tips! I’d also recommend looking into your mirror lock setting if you’re using an SLR; you can avoid the added shake of the mirror snapping up by locking it.
Some really good ideas! Camera shake is my biggest enemy. I have resorted to carrying a tripod everywhere I go. Nice article, and great pics!.
Good point about the camera strap. Its not just there for hanging the camera around your neck…