Are you fond of capturing images that need to be shown in sequence? Or are you planning to try out timelapse photography? If so, then you need the help of an interval timer:

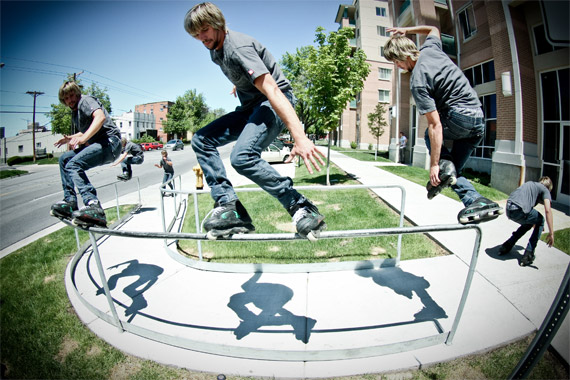
“Rollerblade Sequence” captured by Cameron Card (Click Image to See More From Cameron Card)
Timelapses are ideal when you want to show a process such as a flower coming into full bloom or how to build a bird house. The images are then joined together to create a slideshow. Another option is to create a timelapse video through the use of a video-editing software.
An interval timer may be built into your camera. If not, you will need an external interval timer (intervalometer). You can also use a remote control by a third party manufacturer.
When taking timelapses, use a tripod to ensure that your camera is steady and focused all the time. The tripod has to stand on a solid surface and placed in an area where it won’t be disturbed. Find a good place where your camera has a good view of your subject but consider the sun’s movement while you’re capturing your preferred sequence.
To make sure that you get a clear picture, you will have to pre-focus on your subject. Set your camera into manual mode and switch the auto white balance to manual mode as well. A manual exposure is likewise ideal if you’re capturing a subject under fixed lighting.
Another tip is to use a higher ISO if you choose to shoot at night and at short intervals only. This should be your best option as well if you’re shooting moving objects or subjects.
Experts point out that you can achieve quality images if you’re shooting RAW. However, you will have to use high-capacity memory cards for this purpose.

Intervalometer
As for setting your interval timer, program it according to the interval you want between frames. It can be every 30 seconds or less depending on what you’re trying to capture. Normally, an interval timer can be set from 10 seconds to an hour and a half. You may also have to consider the total number of frames you want to shoot for your sequence.
A good point to remember is to close the viewfinder blind before you begin taking photos. This will prevent any stray light from entering the eyepiece.
Once you’re done with your shooting, it’s time to decide on how you’re going to show your images in a sequence. There are some simple video-editing software available that will help you create a mini movie.
About the Author:
For information about digital camera batteries, visit 42photo.com, New York’s legendary camera store in business for over 40 years.
For Further Training, PictureCorrect Suggests:
Check out this new COMPLETE guide (146 pages) to shooting, processing and rendering time-lapses using a dslr camera. It can be found here: Time-lapse Photography Guide
Like This Article?
Don't Miss The Next One!
Join over 100,000 photographers of all experience levels who receive our free photography tips and articles to stay current:


@Kay – So did I. Mine did not come with a manual so I am searching for any info also. I’ve tried all combinations of buttons but I can only adjust the hours.
I assumed this article would help but it was useless.
I just bought an intervalometer and have no idea how to use it for time lapse photography. Is there a website that shows step by step instructions? The instruction booklet included with my timer is confusing.
Really enjoyed reading about trick photography, I think looking and reading about it caught my interest about it more! Thank you for sharing!
Sincerely,
John E. Nolan