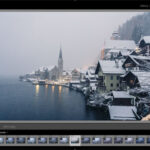
We could all stand to shoot more during the “golden hour”—that splendid wash of yellow and dramatic light created at sun up and sun down. But sometimes we must shoot in less than desirable lighting situations, and in turn, we may end up with a handful of mediocre images. In this video tutorial, Mark Wallace demonstrates how to use graduated filters in Lightroom to give new life to bland images:
The original image, shot in bright sun with a Canon EF 16-35mm wide angle zoom lens, has unbalanced exposure and dull colors. Wallace adds a 1-stop under exposed vertical filter to compensate for the left side of the image being over exposed. He layers on a second horizontal filter to add intensity and detail to the sky and water. As Wallace describes, using the graduated filter option in Lightroom is one quick tool to help add vibrancy and depth to washed-out images.
How to Apply a Graduated Filter to Your Images
1. Before you make any changes, in the Library module of Lightroom, right-click on your image, then click on Create Virtual Copy. This will generate a new copy to work from, leaving the original for easy comparison.
2. Enter the Develop module of Lightroom.
3. Color correct your image using the global settings. Change anything from the color temperature to contrast, highlights, or clarity by using the sliders in the “Basic” panel.
4. Click the Graduated Filter button—a rectangle icon in the right side panel.
5. Click on the Effect drop down menu to reveal filter options that will help you get started, or select Custom and use the sliders to create your desired filter.
6. On your image, click and drag where you would like the graduated filter to be placed.
7. Fiddle around with the filter settings. Try these settings when fixing a semi-cloudy, bright sky: Take the exposure down a stop, add some contrast, pull up the shadows to 60 for some sky detail, set the clarity to around 65, add some saturation, and pull up the sharpness to about 35.
8. The little box on the bottom left hand corner of the Graduated Filter panel can be clicked on and off to show the image with and without the filter.
9. Click on Close when you are done with the filter. A small grey circle appears when a filter is closed; it can be clicked to reopen a filter.
10. The majority of the filter will appear in front of the first line. The area between the 3 lines displays the fade of the filter. Moving the lines closer together will result in a harsher transition, while pulling them apart will create a softer one. You can also rotate the filter to line it up with horizons, buildings, etc.

Original Image—shot at 16mm, 1/640, f/16, ISO 500

The image after applying Lightroom filters and cropping.
What are your favorite graduated filter tricks?
Like This Article?
Don't Miss The Next One!
Join over 100,000 photographers of all experience levels who receive our free photography tips and articles to stay current:


Leave a Reply