If you’re familiar with the reciprocal rule in photography, then you might know how your focal length limits your shutter speed when shooting hand held. For those who don’t know, the reciprocal rule states that your shutter speed should be at least the reciprocal of your focal length for the image to be free from camera shake. But sometimes, you may not able to afford to keep the shutter speed so fast without bumping up the ISO too much. And this means sacrificing image quality. Photographer Tony Northrup explains how to use the rule of doubles to shoot with longer shutter speeds and lower ISOs to get clean and sharp low-light photos:
How to Get Sharper Photos with Slower Shutter Speeds
Follow these steps to shoot at shutter speeds way lower than what the reciprocal rule allows:
- Put your camera in continuous shutter mode.
- Set your ISO to auto ISO.
- Use shutter priority shooting mode.
- Start with the reciprocal rule (i.e., your shutter speed should be the reciprocal of your focal length). For instance, if you’re using a 200mm lens on a full frame camera, your shutter speed should be 1/200 seconds. If it is a crop body, multiply the focal length by the crop factor and adjust shutter speed accordingly.
The shot that you will take with these settings will be your safety shot. The image will be sharp with these settings but can be noisy if the camera opts for a higher ISO. To get cleaner images, do the following:
- Multiply your previous shutter speed by two and take more shots in a burst. For example, if you used 1/200 second previously, 1/200 second * 2 becomes 1/100 second.
- Repeat the above step (i.e., keep on multiplying the shutter speed by 2 and taking multiple frames). Do this until it becomes impossible for you to hand hold the shot—or you get tired or run out of time.
- Once you’re done taking the photos, start from the very last photo that you took and look for the sharpest image. Zoom in 100 percent to review the image and confirm that it’s sharp. The first sharp image will be your “keeper” so you can delete the rest.
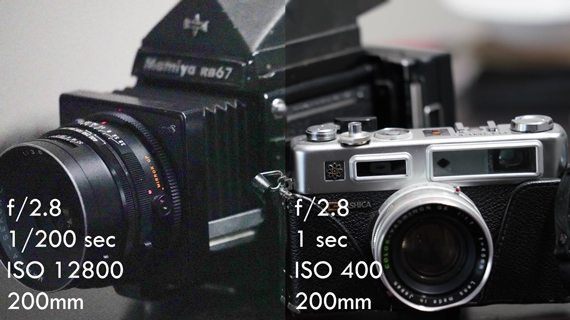
Basically, what is happening is that, as you keep on making the shutter speed slower and slower, the camera goes on reducing the ISO. And thus the sharpest image at your slowest shutter speed will have a lower ISO, resulting in a sharp and clean image. Northrup was able to get a steady hand held shot at 200mm, 1 second, ISO 400 using this technique, which is quite impressive.
Keep the Other Eye Open
The second tip that Northrup shares is to keep both of your eyes open. Many photographers tend to place their dominant eye on the viewfinder and close the other eye. However, by having the other eye open, you will get a sense of how much you’re moving. Make a mental note of how much you’re moving and try to reduce movement to as little as possible. The image stabilization system in your camera or your lens can help you counter minor movement, but will fail if it is too much.
Hold the Camera Properly
How you hold the camera greatly determines how stable the camera is in your hands. Holding the camera in a stable position allows you to shoot at slower shutter speed without much camera shake. To hold a camera properly:
- Use the viewfinder and press the camera against your face. Your face can act as a support to help steady the camera.
- Keep your arms tucked in close to your chest so that they act as a tripod support.
- Use both hands. Grip the camera steadily with your right hand and support it from the bottom using the left hand. If you’re using a longer lens, use your left hand to support the lens.
Shoot in Continuous Mode
Whenever we press and release the shutter button, the camera shakes a little bit. This can reduce the chances of getting a sharp image. It is thus suggested that you take a small burst of photos in continuous shooting mode. While doing this, you will notice that the first and the last images will not be the sharpest ones. You can find your keeper somewhere in between.
Refocus Continuously
When shooting hand held, your body will move back and forth. It becomes necessary to focus on your subject after every few shots. Continuous focus may not be a good option because the camera may struggle to keep track due to poor lighting condition. So be sure to refocus to ensure that you’re not too far out of the focus plane.
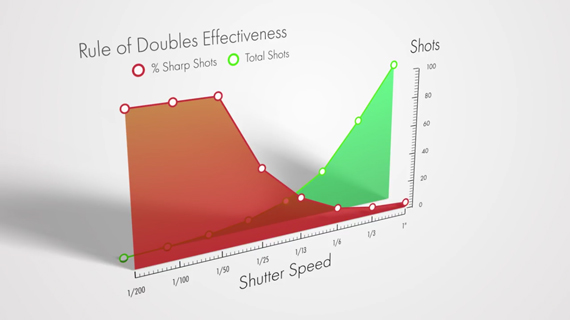
Using all these techniques, Northrup kept track of the effectiveness, and here is the result:
He was able to get the following:
- 100% sharp shots at 2 stops below the reciprocal rule
- 50% sharp shots at 3 stops below the reciprocal rule
- 25% sharp shots at 5 stops below the reciprocal rule
- 5% shots at 8 stops below the reciprocal rule
But hey, at the end of the day it is only that one shot that matters, right? Be sure to try out these techniques and get some super sharp, clean images when lighting is a challenge.
Do you have your own technique to hand hold better at slower shutter speeds? Let us know in the comments below.
Like This Article?
Don't Miss The Next One!
Join over 100,000 photographers of all experience levels who receive our free photography tips and articles to stay current:


Tony…Thanks and will try as I often shoot in low light at church. Auto ISO on the XT2 is weird for me, maybe I am doing something wrong. Suggestions and is the XT3 better in Auto iSO? Fuji indicates 5 stop IS. I think this mean 5 stops below what the camera in auto mode says is correct exposure. Auto exposure in A…start at 1/60>1/2….but I have not seen it in writing.