Making a timelapse is usually a long and hard process. There are so many things that you need to keep in mind. To help you out along the way, Ian Norman has created a pretty detailed tutorial for shooting motion timelapse sequences of the Milky Way:
Scouting a Location
The thing that you need to keep in mind is that you’ll need some experience in astrophotography before you tackle a timelapse. Finding your way around in pitch darkness isn’t that easy, nor is manually setting your focus and all the accompanying issues that come with night sky photography.
Unlike Norman, I’d use a red headlamp for navigating in the dark. Red light doesn’t ruin your eye adjustment to the dark, while white and other colors do. This is for your own safety and the safety of anyone who’s with you.
Once you have your gear checked, you’ll need to find the right day of the month to go shooting. This should be a day near the new moon. The moon reflects a good amount of sunlight and can completely block out the Milky Way.

Moon Phases
To locate the Milky way you can use any star chart app. Most of them do the trick.
Camera Settings
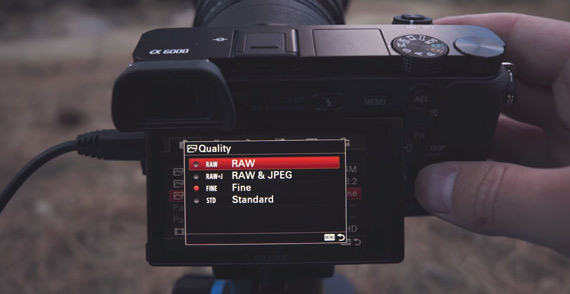
- Set your camera to record in RAW so you can get the best results during post-processing
- Disable long exposure noise reduction.
- Disable auto review to reserve battery power and eliminate the extra light that it produces.
- Use custom (3500–4800 Kelvin) or daylight white balance.
- Set the lens to manual focus mode.
- Once you’ve achieved focus, use a piece of gaffer’s tape on the lens to “lock” the focus.
- Follow the 500 rule for shutter speed, and expose slightly to the right (this means overexposing a bit without blowing out the highlights), in order to reduce noise by increasing the signal amount. Exposing to the right (ETTR) is quite useful with RAW files (which you should use) because the gain is quite bigger than the loss.
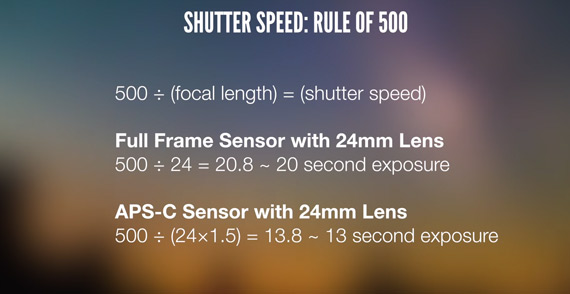
Rule of 500
- Start with an ISO of 6400 for f/2.8 or higher lenses and you can tone down the ISO for lenses with wider aperture.
Norman uses quite a complex slider system, which he thoroughly explains in the video.
Post-Processing a Night Sky Timelapse
Once you have shot the files, it’s time to post-process and compile them.
Load all the RAW files up in Lightroom (or equivalent), then boost the vibrance and saturation to the maximum point. This way you’ll be able to tweak the white balance until the image contains equal amount of orange and blue, same goes for the tint. Then, reset the vibrance and saturation to revert back to the original look and feel. The rest of the image can be processed by your preference.
Once you’re satisfied with one of the images (choose one somewhere in the middle of the sequence), copy or synchronize the settings to the whole sequence. Make sure you do lens corrections and remove fringing and vignettes.
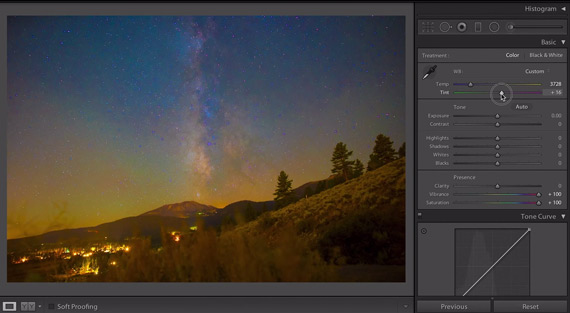
How super saturated properly white balanced image should look
Now you can export your JPEGs, or TIFFs if you want lossless. Resize to your desired resolution on export. Norman used 4k, thus setting the long edge of the photo to 3840. Your long edge should be 1920 for HD resolution.
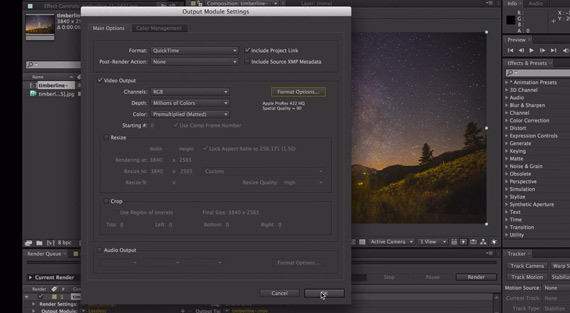
All that is left now is importing the images to Adobe After Effects. You can do this by double clicking the project panel and selecting the first image (images must be in the same folder and alphabetically named). Usually After Effects detects image sequences; if it doesn’, just check the image sequence box. Once you have the images loaded, create a new sequence and do your edits. Then you can render your video.
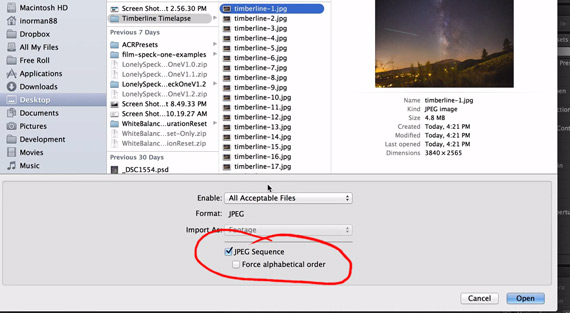
Don’t forget to check this box
If you know what you’re doing, you can fiddle with the codecs, if you want the video for Youtube/Vimeo. Just choose H 264 codec, and set some balanced values (usually there are presets that do that for you). Keep in mind that depending on the things like video length, image resolution, and processing power the rendering time varies. Sometimes it can be several minutes, but sometimes it can take days to complete. Patience is a virtue here.
You might notice some flicker in your video. This occurs when some shots are exposed a bit differently than others. There are several plugins that help with removing this phenomena. Some of the most used are: MSU DeFlicker, Donald Graft’s DeFlicker and DeSeRt.
While there are endless skills and techniques that go into creating timelapse sequences, Norman’s tutorial is a pretty in depth guide for anyone new to the genre.
Like This Article?
Don't Miss The Next One!
Join over 100,000 photographers of all experience levels who receive our free photography tips and articles to stay current:





Leave a Reply