Related reminder: only a little while left to Pre-Order Luminar 4 at a Discount
The internet is filled with landscape photos, and more are added every day. You want your photos to catch the eye and not blend into the background with all the others.
So how do you make your landscape images stand out?
A strong composition and clever editing techniques, like the ones I’m going to show you today in Luminar, will help you get ahead of the crowd.
Filters in Luminar
There are a wide variety of useful filters in Luminar, and they’re arranged into different workspaces. There’s a workspace for every style of photography, from Quick and Easy, through Black & White, to Professional. Each workspace contains the tools that are most useful for that type of editing, such as soft focus for the Portrait workspace.
Foliage Enhancer
Foliage Enhancer is a nifty little trick for enhancing the greens and yellows in your image and making them take center stage.
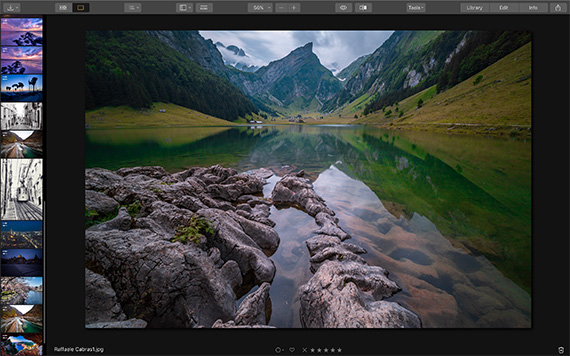
Here’s the original image:

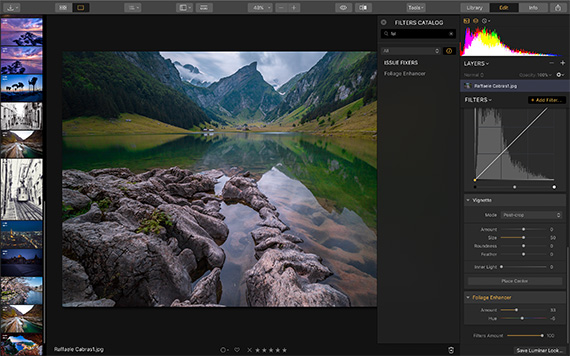
Here it is with the foliage enhancer filter applied:
You’ll find the Foliage Enhancer filter in the Filters menu on the right-hand side of the screen:
One of the cool things about the filters in Luminar is that you can mix and match them to create even more unique effects.
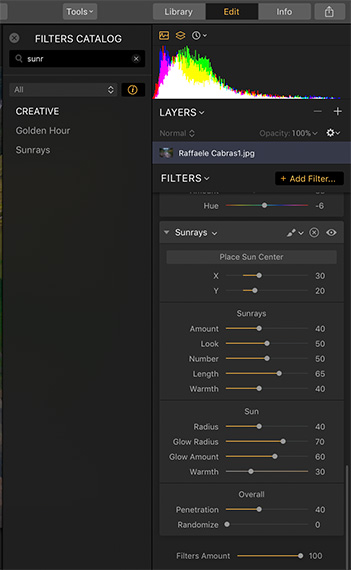
As well as enhancing the foliage, I decided to use the Sunrays filter. This adds sunlight to your image. The trick here is getting the placement of the sun center in the right place for your image.
You can click where you want to place the sun, and move it around until you find a good position. The Sunrays filter also allows you to adjust the warmth, glow, sunray amount and length, as well as other features:
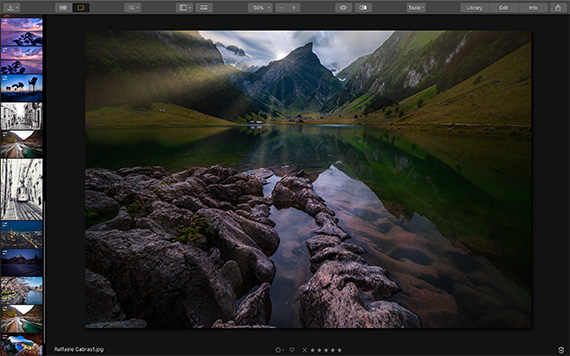
Here’s the image with the sunrays applied:
Accent AI 2.0
The image is still looking a bit dark, so I’m going to try the new and improved Accent AI 2.0 filter. This filter is the second generation of artificial intelligence used in Luminar, and it has enhanced abilities to recognize people and skies in the image and make the adjustments accordingly.
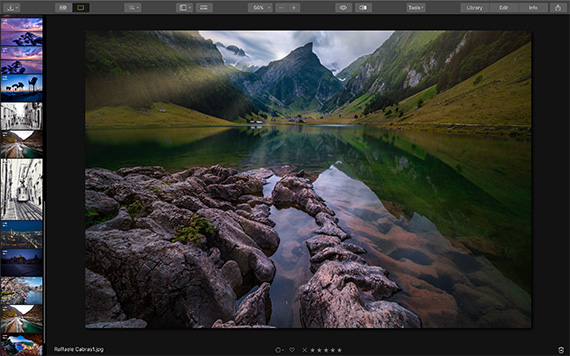
Here is the image with all three of the filters applied: Foliage Enhancer, Sunrays, and Accent AI 2.0.
LUT Mapping
LUT mapping is a brilliant way to color grade your images and give them a harmonious color scheme. LUTs are best applied after all of your other adjustments have been done, because they add the finishing touches.
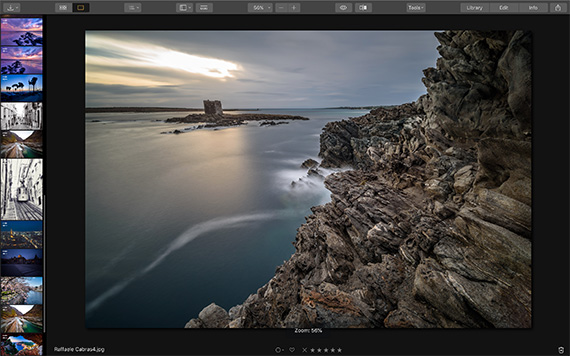
Here’s the original image I’m using:
First off, I used Accent AI 2.0 to make any basic adjustments the image needed, then I added a LUT to the image.
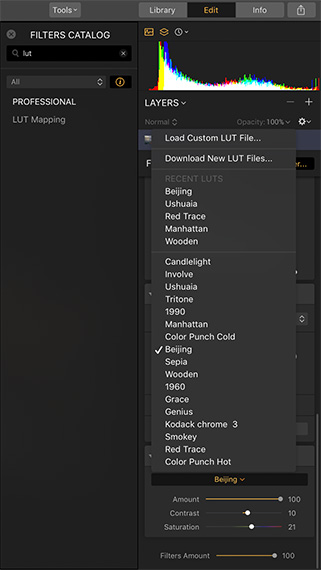
The LUT filter menu is on the filters drop-down, and if you click on Choose LUT, you’ll find a selection of built-in LUTs to choose from:
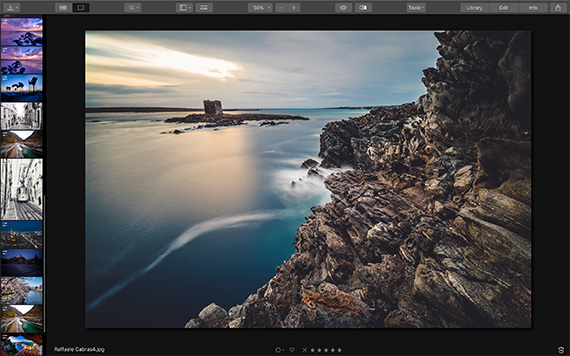
I chose to use the LUT “Beijing” to enhance this image, and this is at 100 percent strength. You can adjust how strong you want the LUT to look on your images:
All photos © Raffaele Cabras
LUTs are a great way to bring out the best in your landscapes, as long as you do all your adjusting before applying them.
There are lots of versatile filters that you can use in Luminar to give your landscape images a creative edge. You can even create layers with different filters on them for a dramatic, unique look.
Pre-Order Sale on Luminar 4 Ending Soon:
Currently available to pre-order at a discount, Luminar 4 is designed to elevate photo editing to new heights. Revolutionary tools and AI technologies open breathtaking potential for your creativity. With a refreshed interface and workflow, Luminar 4 shifts from being a tool-based approach to one that is purpose-based.
Luminar 4 is the biggest update in the program’s history. Based on user feedback and data that the company has studied, the software has received significant improvements and refinements. The pre-order sale (with a bonus) is ending soon if you want to check it out.
Found here: Luminar 4 Photo Editor Pre-Order Sale
Like This Article?
Don't Miss The Next One!
Join over 100,000 photographers of all experience levels who receive our free photography tips and articles to stay current:




Leave a Reply