There are many factors that go towards creating great landscape photography. Some of the most popular and successful landscape photos usually follow a few of the elements described in this article while ignoring a others in order to create a unique scene. Here are a few items to consider while setting up your shot.
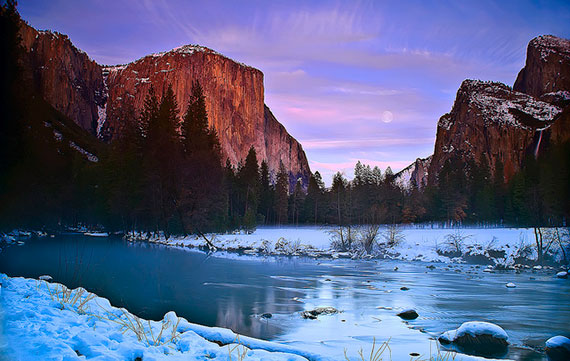
Photo by Anita Ritenour; ISO 100, f/22.0, 2-second exposure.
Lens
Using an ultra wide angle lens is standard, in order to pack us much of a scene as possible into the picture. However, it’s worth experimenting with a telephoto lens too.
Composition
Pay attention to the rule of thirds, i.e. break the image down into a nine square grid, then place any lines in the picture, or focal points, along the lines of the grid.
Focal/interest points
Placing a person, trees, or a building in the foreground can give a focal point and add a sense of scale to an image.
Light
Some landscape photographers never shoot during the day, only at dawn and dusk when the light can strike life into a landscape. It’s not just the reds and pinks of sunrises and sunsets that can create drama, but the golden light of a low sun can warm a scene and create surprising textures and patterns thanks to its low angle. Similarly, storms, mist, thunderous clouds and dark skies can be much more exciting to work with than a sunny day or a beautiful sunset.
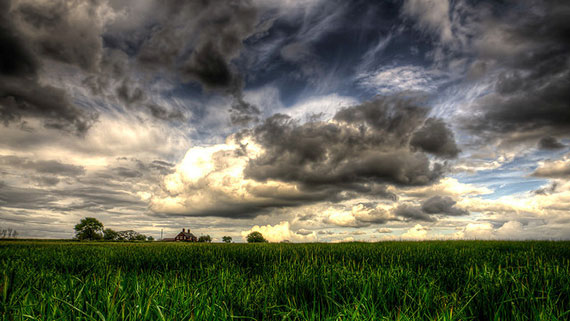
Photo by Jamie Barlow; ISO 100, f/11.0, 1/160-second exposure.
Depth of field
When using an SLR, or a digital SLR, combine a slow shutter speed with a small aperture to make sure your photograph has sharp focus up to the very edges. For this you will need to ensure your camera is steady as any handshake can create blur. The obvious solution is a tripod or if you don’t have one try to find something on which to rest the camera.
Exposure
Because the sky is usually very bright and the ground not so, this presents all cameras with exposure issues. If you can, then using a graduated filter will help to even out the brightness.
Location
Walk around the location to find the best place from which to take a shot. Time spent preparing is never time wasted, especially when you find a more interesting point of view to shoot from. Wander around, get down low or climb a tree to find that interesting vantage point.
Atmosphere
Shooting in black and white can produce some dramatic landscape images. If shooting film and you have two cameras, you could simply switch cameras to the one loaded with black and white film. Alternatively, with a digital SLR camera, it is simple convert it to monochrome in Photoshop afterwards.
Sky
In most landscape shots, either the foreground or the sky will dominate. If the sky isn’t particularly dramatic, place it in the upper third. Conversely, if the sky is full of interesting colours and cloud shapes, place the horizon in the bottom third.
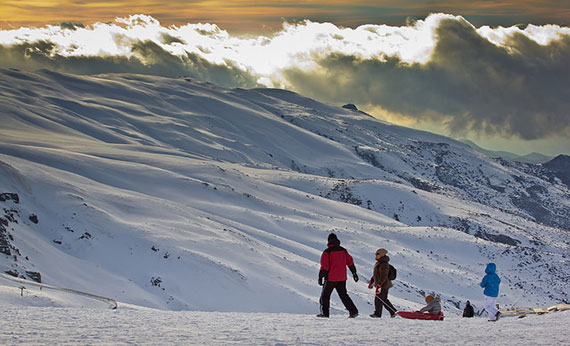
Photo by Hernán Piñera
Movement
Few landscapes are as truly still as we might imagine. Birds flying through the sky, clouds blowing, water running and waves in the sea are all examples of potential motion in landscape shots. Incorporating motion can add drama and focal points to a photograph, although it will mean that you will probably need to employ a longer shutter speed (up to a few seconds). Because this will mean greater exposure, you will have to use a smaller aperture or an appropriate filter.
About the Author:
Miranda Wilson writes about Digital SLR Photography for Calumet Photographic.
Like This Article?
Don't Miss The Next One!
Join over 100,000 photographers of all experience levels who receive our free photography tips and articles to stay current:




Oh, and monochrome is *not* a matter of simple conversion in PS.
Done properly, you should be visualising how you want it to come out before you push the button – you have to ask yourself
1) whether the scene is primarily about colours or shapes&lines&form&textures etc;
2) if the latter, how does the scene’s colour-separation compare to its object-separation? Are you going to need a filter?
3) if you’re going to need a deep red or blue filter, do it in hardware at the scene rather than cause noise in software later
4) do you want the b&w conversion to be neutral (often weird), warm/vintage (sepia, platinum) or cold (cyanotype, gold)?
The mechanics of adding a b&w adjustment layer in PS are easy; the rationale is not.
Reasonable article. Landscape is an easily accessible subject to appreciate, but actually quite hard to produce to a degree that demands appreciation. Certainly it’s useful to think in terms of elements to throw into the shot.
The thing to remember is that choosing a fixed position on any of the criteria in this article will turn you into a one-trick pony, as it were: you become “someone who shoots ultrawide” (and goodness knows the implication “landscape -> wide” is as subject to taste as any other parameter), or “someone who goes out in the golden hours only” (ask yourself what is *good* light? How about *appropriate* light for the scene, instead?), and so on.
I suggest a very loose attitude to the norms here – especially the one about thirds. What I find most interesting at the moment is setting the aspect-ratio to 16:9 (it’s both more realistic for how one’s eyes see the world, and more cinematic) and guidelines to golden ratios instead of thirds, and then place objects in the frame in a harmonious arrangement (don’t think of it as wiggling yourself around – the contortions you go to to get a shot won’t reflect in the result; think of it in terms of placement in frame).
beautiful images
Nicely presented, another most commonly used option for capturing dramatic landscapes is HDR! Worth mentioning :)
Great breakdown on shooting landscapes! I like to experiment shooting the same shot at different times of the day. It’s amazing how the lighting changes throughout.
just need to look what and why and how …thx