A Milky Way panorama is the sort of image that every photographer probably wants to have in their portfolio. The more dramatic, the better. While the choice of location is up to you, there’s much more to getting a great shot. Milky Way Mike shares the basics of stitching a Milky Way panorama and other technicalities post-processing:
How to Stabilize Your Camera for Milky Way Photography
A steady tripod, a slightly heavier variety, will keep the weight firmly down and secure the camera.
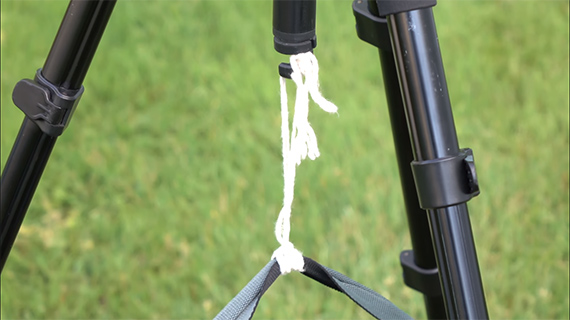
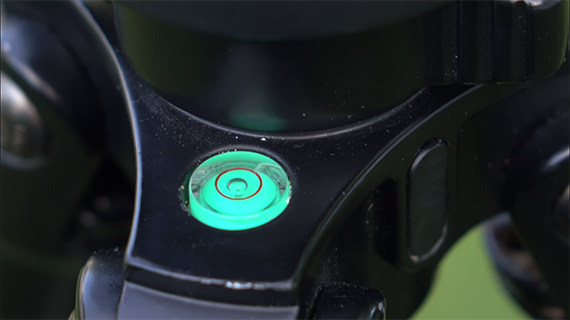
If your tripod comes with the option to hang a sandbag, even better. It gives additional stability. Also, ensure that your tripod is as level as possible so that you have a better time stitching your panorama shots.
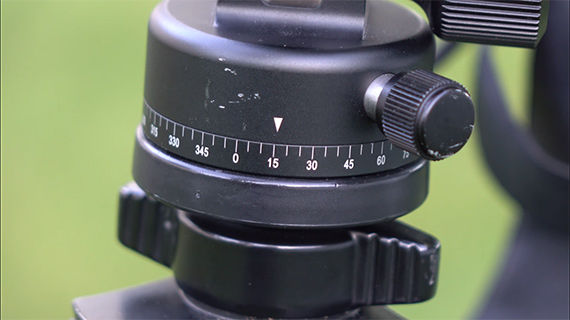
There are many different brands and designs of tripod heads that are suitable for shooting a panorama. However, a tripod head that comes with a 360 degree panning base is probably what you should go for.
In this video demonstration, Mike uses a monopod tilt-head with a panning base and a nodal slide rail that is Arca-Swiss compatible. This has several advantages:
- It allows the photographer to swap from landscape to portrait mode in a ziff.
- It disperses the weight of the camera lens more evenly.
- The photographer can choose the nodal point of the lens.
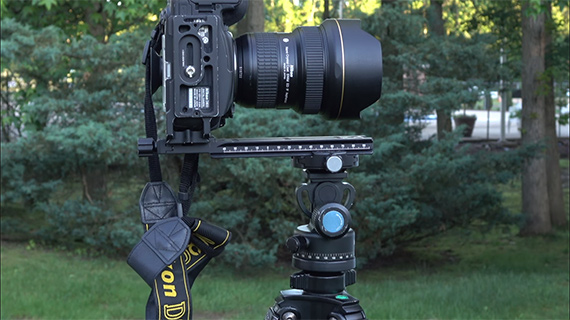
The last being an effective way to eliminate parallax. This is the distortion that happens when you pivot from the base of the camera rather than the lens.
Lens and Camera Settings for Milky Way Photography
The preferred lens for panorama is a 14–24mm at 14mm and the camera set up at portrait orientation. The preferred settings are 20 seconds, ISO 3200–6400, f/2.8–3.2. Trigger the shutter with a remote or using a timer. After each shot, pivot the camera at 15 degree increments. This ensures there are a number of overlapping shots, which is critical for a successful stitch.
Stitching Milky Way Photos in Lightroom
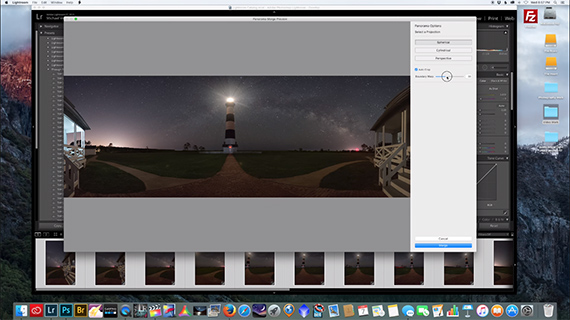
It’s highly recommended that you start your Milky Way experimentation with just a single row of images. It is less complicated to shoot and can be easily handled by Lightroom when stitching. You can start experimenting with a second row of images only when you have gained some experience.
To stitch the images together go to Edit > Photomerge > Panorama. Once Lightroom finishes merging the photos, check Auto Crop to create a proper crop out of the stitched photo and crop out the edges. Tweaking the Boundary Crop can also help. Hit Merge when you’re ready.
Let us know if you give this a try!
Like This Article?
Don't Miss The Next One!
Join over 100,000 photographers of all experience levels who receive our free photography tips and articles to stay current:




Leave a Reply