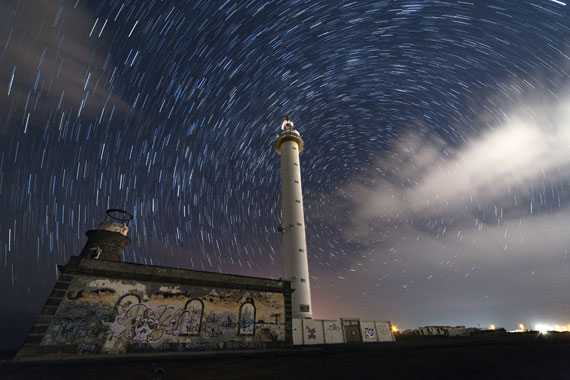
It wouldn’t be wrong to say that timelapse photography is at a halfway-mark between photography and videography. Timelapse photography is all about capturing a series of photos at specific intervals of time which you can later place in a sequence and export as a video clip. As an alternative, you could also stack them all up to come up with a single composite.
Not everything around us remains stationary over an extended period of time. So, we can notice a certain level of movement in the timelapse videos. Results from a timelapse photography session feel time travel; as if you are going through time at a rapid pace. This is what makes timelapse photography so fun.
While the end results of timelapse photography are quite enjoyable to watch, shooting it requires a lot of patience and a good knowledge of what you’re doing. This becomes even more important when you’re doing timelapse photography at night as the settings you choose becomes absolutely crucial.
Aperture
Your aperture controls the amount of light entering the camera. Using higher f-numbers like f/8 or higher allows only a little amount of light to enter the camera which can underexpose your image. It is thus recommended that you use wider aperture settings like f/2.8 or f/4.0 to allow greater amount of light to enter the camera. This is especially important if the subject that you’re photographing timelapse of is dimly lit – like stars.
ISO
If you’re planning to create a video clip out of your timelapse images, feel free to push your camera’s ISO to its limit. That’s because luminance noise is not so prominent in videos and should not be much of an issue. Based on your camera’s ISO performance, even something like ISO 6,400 should do fine.
But, in case you’re going to stack the images up, opt to go with a moderately high ISO so as not to underexpose your image. Something in the range of 1,600 – 3,200 should work fine depending on the make of your camera.
Shutter Speed
Decide on your shutter speed based on how quickly your subjects are moving. For instance, if you’re photographing a timelapse of the stars, you could easily shoot a single exposure of 20-30 seconds or more. But, in case you’re shooting a timelapse of the city with cars moving on the road, an exposure of a few seconds like 3-5 seconds should suffice.
If you want to lower the amount of noise in your timelapse, you could slow down the shutter speed which will allow you to lower the ISO.
Shoot Raw
JPEG files are good if you quickly want to work with all the files that you’ve shot for your timelapse. But in case you want to adjust something to your liking, raw files will have a much greater degree of freedom. And don’t worry, you don’t need to be working with all the hundreds and thousands of raw images. Software like Lightroom allows you to tweak one image and apply the adjustments to the rest of the images in the click of a button.
Focus Setting
You wouldn’t want your camera to hunt for focus after every shot. And when it’s night time, the camera will definitely struggle to lock focus due to the low light conditions. So, be sure to set your camera to manual focus mode from the very beginning. Focus on your subject, or at a distant light source, and forget about it.
If you plan on photographing timelapse at night when it’s cold outside, consider getting yourself a lens warmer. This prevents condensation from forming on the lens and allows you to keep on shooting throughout the night.
Like This Article?
Don't Miss The Next One!
Join over 100,000 photographers of all experience levels who receive our free photography tips and articles to stay current:


