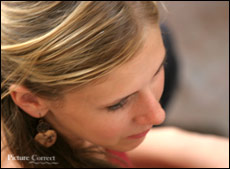
 Good skintones. The search for the holy grail of digital photography. I have been banging our heads against the wall for years trying to perfect “THE ONE SIZE FITS ALL” solution to working with skintones and I’m talking about capturing, workflow, output, the whole nine yards. What I’ve figured out so far is that skintones are somewhat subjective. The procedures that ultimately create good skintones are as follows:
Good capture:
When you capture the image 99% of your job is done. If your exposures are off and your color balance is off, then your skintones will be off. Of course this means your lightmeter will be your best friend (second to your dog). Be on top of your exposures like dirt on a pig. Know your histograms and image tones. Don’t just use your LCD as a reference. Your LCD brightness varies, and is not 100% reliable to use on it’s own, however it is an integral tool that works with everything else. Never get lazy here, always check your exposure, know your exposures and keep it accurate. Make this a part of your mind set and workflow. And don’t forget to test new stuff, never assume….
Colorbalance:
I like to shoot a greycard under the lighting conditions we are shooting in as a custom whitebalance setting. For some reason a greycard seems to work better for us than a whitecard. What can I say. I get images that are neutral, I can warm them up later if I choose. However, for many digital photographers, using a white card to create their custom white balance weems to work just fine.
Workflow:
I like to get an idea of what a good skintone is by using the colorpicker. Now remember, skintones are subjective, so it’s purely arbitrary but you will get used to it in time. So, as a rule of thumb, using the color picker, depending on the actual pigmentation of the subject we find the reds are about 20% higher than the green and about 30 – 40% higher than the blue. Since during the capture the tone has been turned off (in camera parameters), I can add more to the skintone by using colorbalance and saturation.
Assuming that you have good capture, (exposure/whitebalance), there are several ways to acquire or enhance skintones. One of the best ways is by using the selective color (IMAGE/ADJUSTMENTS/SELECTIVE COLOR, or ALT-I-A-S). I have been using this for a little while now, and so far it’s rendered me outstanding skintones. Here’s how it works.
Simply reduce the amount of cyan in the reds. Usually about 40-50%. I could go more, but I hold off. Why? Because when I adjust the contrast later it will bring out more tones in the image, thus giving me more red in the skin. There is al lot or red in the skin, especially caucasians, so by doing this technique you will give most people more warmth and glow to their skin tone- but be careful!! Do not over do it.
The thing I like about using the selective color this way, is that I am only working with the red tones. If I didn’t want to affect any other reds (like the reds in her coat) I can simply do several things:
1. make a selection around her face and then perform the adjustments.
OR
2. after the adjustments simply use the history brush and erase the areas I don’t wish affected.
That’s it. Simple isn’t it, when you get down to the basics.
Robert Provencher has been a professional portrait and wedding photographer for over 25 years. He has trained hundreds of professional photographers throughout North America in live workshops and through his online forum. Robert has authored several manuals on digital photography and photogaphy marketing. http://www.nobsphotosuccess.com
Like This Article?
Don't Miss The Next One!
Join over 100,000 photographers of all experience levels who receive our free photography tips and articles to stay current:


Leave a Reply