In a recent article titled Lasting Impressions: How to Create Memorable Travel Photographs, PictureCorrect provided detailed coverage of a lecture by Luke Ballard, an esteemed travel photographer who has successfully combined his two great passions—photography and globetrotting—into a successful career.
Ballard returns in this video with fresh instruction on how to survive in this highly competitive industry without resorting to selling one’s carefully contrived images for less than their worth:
Good Habits Make Good Travel Photographers
1. Time your travels to coincide with photo-worthy events. Then try to capture those iconic events in fresh, new ways.
2. Always carry a camera with you. Better yet, carry the equipment you’ll need for each particular situation that you might encounter while you’re out exploring.
3. Use filters—it’s not cheating! Ballard uses Cokin graduated ND filters, Hoya variable ND filters, and Hoya circular polarizing filters. See this article for an overview of the different types of filters and when to use them.
4. Set yourself an assignment. Deciding on achievable, photographic goals before going out on a photo walk is important. Even a very basic theme like “circles” or “blue” can provide focus and pave the way for growth, productivity, and creativity, eliminating those thousand ill-contrived snapshots.
“We want to eliminate those thousand snapshots and just focus on getting the really good photographs,” Ballard said. “Be very conscious of what you’re photographing. You did not buy an SLR to use it like a point and click.”
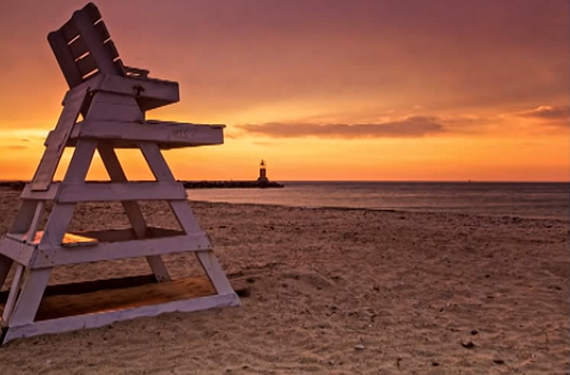
At the beach, one of Ballard’s goals is to shoot beach furniture devoid of people.
5. Follow the rule of thirds, but when you decide to break it, break it dramatically. Ballard estimates that he composes according to the rule of thirds 95% of the time and that he breaks the rule only on the grounds of symmetry and the rule of tenths.
Symmetry, like the full reflection of a tree in a body of water, balances the image so that a composition with the horizon line in the middle of the frame makes sense. Similarly, Ballard’s rule of tenths also replaces the rule of thirds with balance, but instead of two things getting equal weight, the rule of tenths calls for the subject to fill 1/10th of the frame and for negative space to fill the remaining 9/10th’s of the frame, or vice versa.
“If you are going to break the rule of thirds, don’t just do it a little bit,” Ballard said. “If that’s all you do, it’s going to look sloppy. It’s going to look like a bad photograph. It’s going to look like you don’t know what you’re doing. But breaking it dramatically, breaking it with style, and breaking it with passion can make it a very effective photo.”
6. Know when and when not to include people. Ballard believes that landscape photography shouldn’t include people, but that in many other types of travel photographs (sports, portrait, and event photography, to name a few), including people is often critical to being a good storyteller.
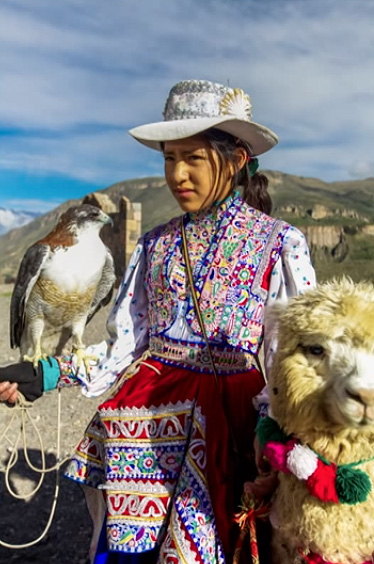
Portraits often make striking travel photographs.
7. Accentuate your foreground. The foreground is possibly the most important aspect of a travel photograph—especially a landscape shot. The farther a focal point is from the camera, the less impact it has and the less it contributes to the story being told by that particular photograph. One way to accentuate your foreground is to shoot as close to eye level with your focal point as possible.
8. Use single point auto-focus. Or as Ballard says, “A lot of red dots don’t help you a lot.” Using single point auto-focus, centered in the middle of the viewfinder, actually affords a larger measure of control because it becomes much easier to lock in the focus and re-frame to compose the final shot.
9. Shoot local—go global. Look for ways to make the locations in your photographs identifiable to the viewer without shooting the same shot that everyone takes. The best travel photographers don’t need those iconic landmarks to capture the vibe of a location. Try photographing demonstrations, art, street performers, architecture, and even identifiable signs, street locations, and graffiti—anything that will give the viewer a sense of where you are without that world wonder or landmark.
“Our goal as a travel photographer is to take a local scene that is in front of us and share it with the rest of the world,” Ballard said. “We can capture the mood, the feeling of a city, the feeling of a location, without the landmarks helping us out.”

The iconic streetcar instantly clues the viewer in on the location of this photo: New Orleans.
10. Take every photograph like it’s film. In other words, be intentional about the photos that you take. Really stop and consider your goal(s) for each shot and the story you want to tell before you click the shutter. Ballard believes that the photographer who is willing to slow down and study the craft will likely produce higher caliber images and, ultimately, succeed in the end.
11. Shoot in RAW. In Ballard’s words, “Shooting in JPEG is like driving a Ferrari and keeping it in first.” The RAW file format allows the most control over the final image in post processing.
12. Streamline and optimize your post production workflow. While post production workflow will necessarily look a bit different for each photographer, Ballard’s recommended process is as follows: adjust exposure, tweak contrast, slightly adjust vibrancy and clarity, add more graduated filter, dodge and burn with adjustment brush, straighten crop, and remove noise.
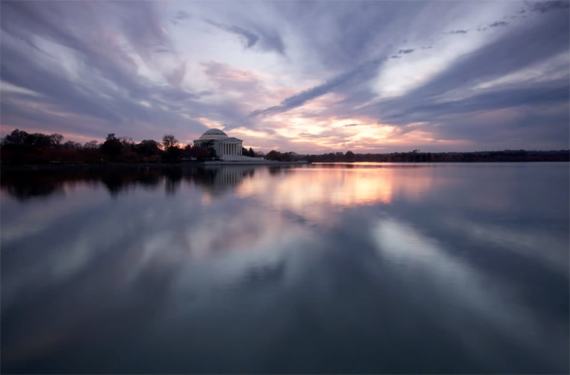
Jefferson Memorial — before post processing.
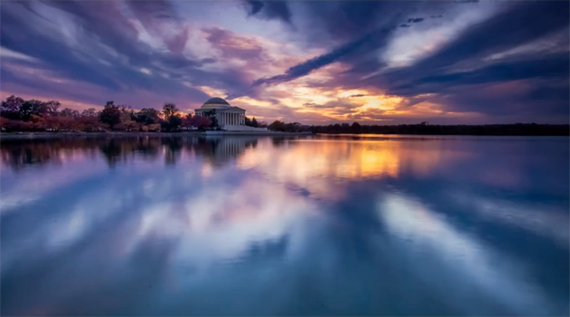
Jefferson Memorial — after post processing.
13. Take your portfolio seriously. Even in our digital age, Ballard believes that nothing makes an impression like a printed portfolio, although he also maintains a digital portfolio on his iPad.
“You are only going to be taken as seriously as you take your own portfolio,” Ballard said. “If you’re ever sitting down with a photo editor or you’re submitting photos to a magazine or to a gallery, don’t send them a link to your Flickr account. They will not take you seriously… If you are presenting work online, it should be on a professional website that highlights you and your work.”
14. Be careful when selling images as stock photography. Stock photography used to provide photographers with excellent means to make a living, but the digital age has caused the value of stock photos to plummet, which means that stock photographers get paid little for their work.
15. Submit to magazines. Since it’s much more cost effective for magazines to purchase images from stock photography websites, selling images to publications has become difficult, so it’s important to know how the proper steps to take when submitting images.
- Research to make sure that you are submitting your photos to a relevant publication.
- Contact the magazine to request the photo editor’s name and email.
- Submit your photos by sending the photo editor a concise email with a link to a professional online gallery containing 6-7 of the best and most relevant photos.
- Do not send attachments!
- Make sure the photo editor knows who you are by including a profile photo and biography on your gallery page.
- Caption your photographs to make it easy for the photo editor to see their relevance.
- Tell the story in words and in your photographs when you submit. Magazines are selling stories and want photographs that complement them.
- Do not stalk the photo editor.
- Do not submit the same images to multiple publications.
16. Create a professional online gallery where you can sell your work easily. As mentioned earlier, make sure that your gallery includes a biography and a profile photo… and make sure that it isn’t Flickr. For this, Ballard recommends Zenfolio, SmugMug, and personal professional websites.
17. Price yourself fairly but competitively. Research photographers in your area who sell the same sort of work that you do and price yourself similarly.
18. Watermark your images. Make sure that your watermark includes the URL to your full gallery.
19. Use social media. Create a Facebook page that links to your gallery and ask your friends to join, like, and share your page. Share one image each day or every other day with a link to the purchase page in your larger gallery and ask your friends to share those too. Additionally, submit your images to photography competitions, photo-of-the-day websites, and Facebook pages.
20. Remain consistent and don’t give up. You can make a living behind a camera.
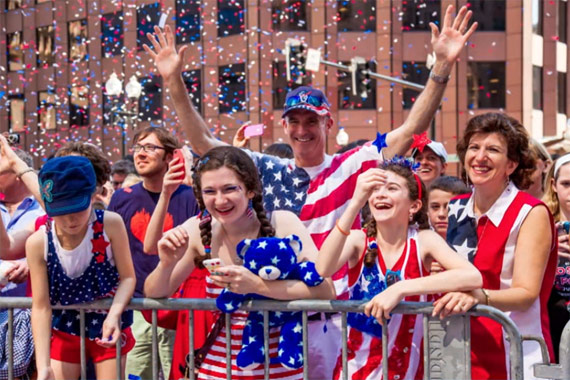
When Ballard shoots a community event, he always finds the event’s Facebook page and posts his best 1-2 photos there with links to his purchase gallery.
“You’ll find that the greatest photographers all have one thing in common, and it’s that they do a lot of little things really well and they do it consistently.”
Like This Article?
Don't Miss The Next One!
Join over 100,000 photographers of all experience levels who receive our free photography tips and articles to stay current:



Hi,
I’m new to landscape photography so please bear with me.
I have seen such photo here: https://www.vpuzzler.com/en/photo/golden-mount-temple-in-the-bangkok-city-P72227/
Can somebody tell me how this photo was shot? Especially I would appreciate info about the light setup.
THX B.
I’ve got a trip abroad coming up and would like to take my gear. How do I travel with it? What is safe to check. Do I have to worry about the scanners?
Hi Nick,
I apologize for the delayed response — I have actually been traveling myself!
As far as I know, you won’t need to worry about the scanners damaging your gear, but definitely make sure to do your own research on that or contact your airline. If you’re planning on taking a lot of gear so that you’d need to check it, I’d recommend a hard Pelican case. If you’re taking less than that, I’d carry it on the plane in a sturdy, well-padded camera backpack from Lowerpro, F-stop, etc.
In another video, which I covered in a PC article titled “Lasting Impressions: How to Create Memorable Travel Photographs,” Ballard recommends contacting your airline and getting it marked on your frequent flyer account that you’re carrying camera gear; he said that airlines usually make exceptions for photographers and allow him to carry on larger bags/cases full of gear that they don’t want to insure in their cargo hold.
Best of luck and safe travels!