Don’t you wish you could spend less time going through hundreds of photos and get to the nitty-gritty of editing more quickly? Check out this eye-opening tutorial by photographers Rachel Gulotta and Daniel Inskeep. They give us a whirlwind tour of the software and methods they use to cut their editing time down to the bare minimum:

Even the most experienced photographers can find themselves plagued by huge amounts of editing time. And while most of us are okay with working on our favorite photos from a shoot, getting to those favorite photos can be quite a long process. Batch processing is helpful if you shoot in a way where all the photos need the same adjustments, but slow-loading previews–either in the culling stage or the editing stage–can be enough to make you tear your hair out.
Organizing Your Photos
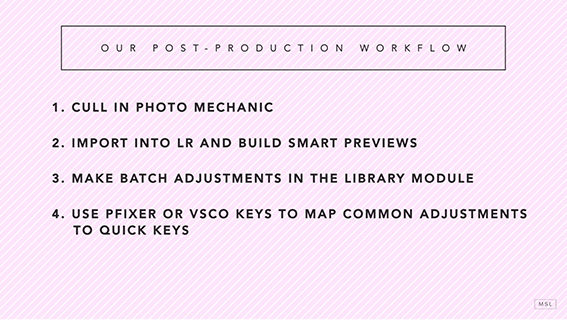
Gulotta and Inskeep first create three folders for each shoot: RAW, Selects, and Catalog. They drop all photos from a shoot into the RAW folder, then look at and cull the files in Photo Mechanic. They tag only the photos they want to bring into Lightroom and drag those files into the Selects folder.
Of course, you will have to make a bit of an investment in Photo Mechanic if you want the speed, but if those microseconds aren’t that important to you, Adobe Bridge will work as well.
Optimizing Your Settings
If you haven’t been using smart previews in Lightroom to speed up the time it takes to move between photos in the Develop module. On some computers it could makes seconds of difference for each photo preview.
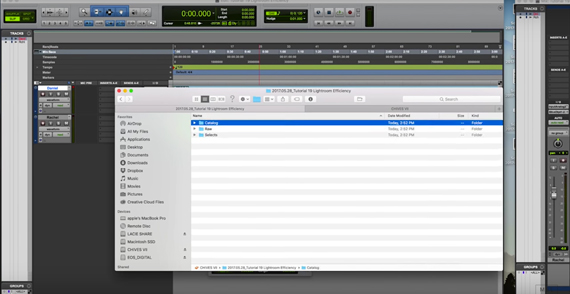
Gulotta and Inskeep create three folders for each shoot (and sometimes more).
Another key piece of wisdom is to use PFixer/VSCO Keys to create quick keys so you don’t have to use the sliders. Quick keys allow you to use a single keystroke to make a change that would normally be a mouse or trackpad click. Your hands never really need to leave the keyboard. It’s amazingly fast; once you try it, you probably won’t want to go back.
Speeding Up Your Workflow
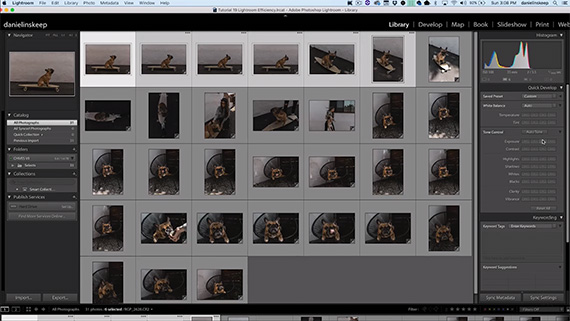
Once you’re in Lightroom, you can speed up basic edits by doing a batch edit in the Library module. For example, you can change the exposure on several photos at once.
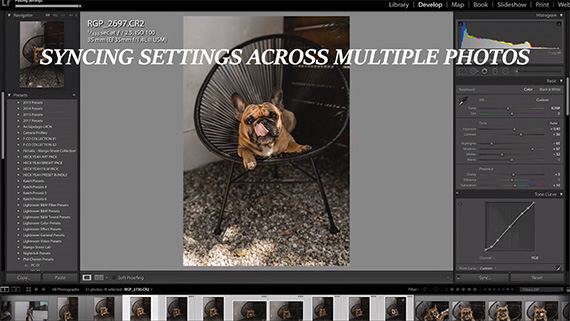
Another way to go about editing photos quickly is to use the Sync option in Lightroom’s Develop module. Edit one photo to your liking, then apply all those settings to any other photo with the Sync button (or Command + Shift + S).
Do you have any other secrets for cutting down your post-processing time? Let us know!
Like This Article?
Don't Miss The Next One!
Join over 100,000 photographers of all experience levels who receive our free photography tips and articles to stay current:


Adobe CC has a program called Bridge – does this do the same sort of thing as PhotoMechanic and, if so, why do you prefer PhotoMechanic over Bridge?