Having a home studio is amazingly convenient. But not everyone has enough space in their home. And even though you may have an extra room to spare, you’ll need to pay attention to certain factors to get it ready. In the following video, photographer Jay P. Morgan points out things you should consider when setting up a home studio and provides some inexpensive DIY solutions:
Things to Consider When Setting Up a Home Studio
Paint side walls white using flat white paint. Light bouncing off the walls can create a color cast on the subject. By painting the walls white, the problem is easily solved. The flat white wall can even be used as a reflector during photo shoots to fill in harsh shadows.
Use black curtains on the walls. Sometimes the light bouncing from the side walls is too much and can get your light ratios all wrong. A simple solution is to use black curtains over the walls to control the bounce.
You can opt not to paint the back wall. You will need to use a seamless background anyway, so you can leave the back wall as it is.
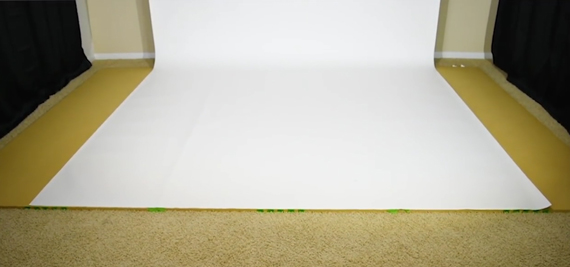
Pay attention to the floor. The carpet on the floor can make working with seamless backgrounds difficult. When subjects walk on the seamless background, the carpet can cause it to crunch. So if you have carpet, make it work by laying down some layers of plywood.

Plywood over carpets to avoid the seamless from being crunched
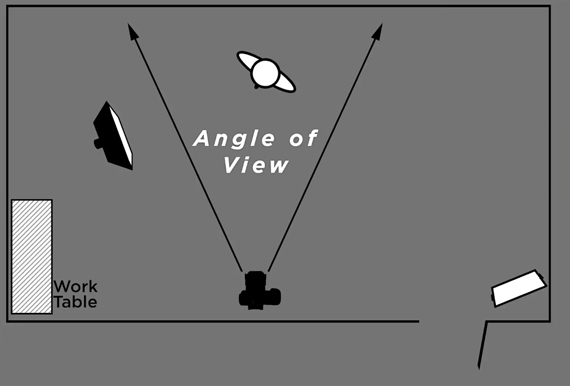
Be mindful of the camera’s angle of view. The camera’s angle of view is like a triangle. It sees more things farther away, while it has a narrow field of view up close. You can make use of this “blind spot” on the sides by placing light stands, reflectors, and other gear to make the most out of the available space.

Make use of the space where the camera cannot see to optimize your space usage
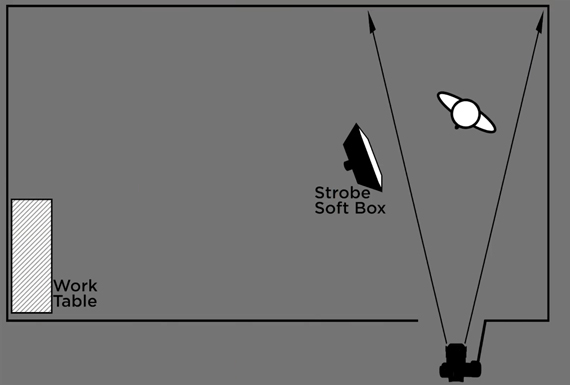
Make use of the door. If the room is too small to take a full body shot, make use of the door. You can compose your shot by stepping outside the door, which will add some more width to the room.

Compose from outside the door if the studio is not big enough for a full body shot
Lighting for Your Home Studio
If you’re just starting off with lighting in your photography work, Morgan suggests working with LEDs. They give off continuous light and let you know exactly how the light will affect your photo.
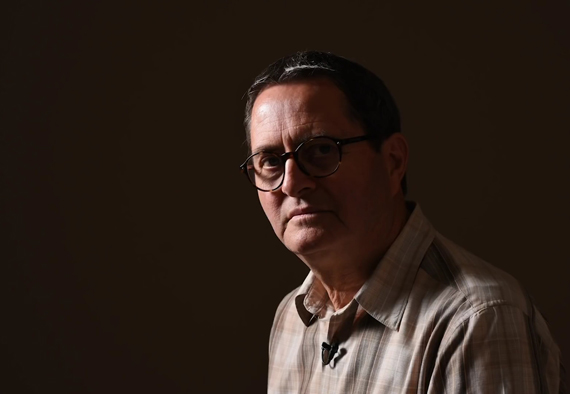
But if you’re comfortable with strobes, go ahead with them. To begin with, a single strobe mounted on a light stand and covered with a soft box should get the job done. This basic light setup can get you some soft light and help you shoot moody portraits.
Advice on Making a Living with Photography
Now that you have your home studio set up and ready, you might want some advice on making it work. Morgan shares two simple things that you need to focus on:
- Think about what subject is most interesting to you. You need to find something that you’re interested in photographing that people are willing to pay you for. Think of things like head shots, senior portraits, children’s portraits, animal portraits, or whatever. Find something that you like and are comfortable with and focus on building your business model on it. Build your portfolio on what you choose to shoot and also make use of regular social media posts to spread the word.
- Once you get going and start posting regularly on social media, you will come across two kinds of people: those who feel indifferent toward your work and those who feel that your work is great and start noticing you. Reach out to those who notice you.
Finally, when you’re confident enough with your work and feel that you are ready, start charging for your work. You can start off with lower rates while making sure that you’re not devaluing yourself and the industry. And slowly as you make your way up, increase the rates. Get to understand the industry rates in your area and charge accordingly.
I really hope that you found this article helpful, especially if you were planning to get a home studio for yourself and starting your photography business.
Like This Article?
Don't Miss The Next One!
Join over 100,000 photographers of all experience levels who receive our free photography tips and articles to stay current:


Leave a Reply