If you’re new to photography and looking for some simple ways to get your photos looking better, this article will give you 7 useful tips.

Photo by Trina Alexander; ISO 400, f/2.8, 1/80-second exposure.
These tips are all composition-based and help you use your “eye” more when taking photos.
Tip #1 – Avoid the Center
The rule of thirds is what they call it in the photography books. Basically this advises people taking photos to avoid the center when photographing subjects or objects. This is a great tip to start following with your photos. Simply avoid placing people, animals, or anything of interest dead center. Instead, move it to the left or right, or even to the top or bottom.
An example of this is when you take a picture of a person. The main point of interest is their eyes. So, simply avoid placing their eyes dead center. Place them somewhere else!
Tip #2 – Use Lines to Lead the Viewers
Lines are everywhere. It’s just a matter of noticing them and using them to create dynamic and more interesting images. This is actually the first of two more tips just with using lines!
The way to use lines to lead the viewers is simple. Simply find your subject and look for lines around. Then move to a position where the lines point to your subject. This can be subtle or obvious. An example of this is having your subject stand near a wall and positioning yourself so the lines of this wall point to your subject. This prevents us from standing straight in front of the subject and taking a picture, reducing the depth. By using these lines, the depth of your shots will become much more expansive.
Tip #3 – Use the Horizon
Horizontal lines are very peaceful and relaxing. Just think of a sunset over a flat field of grass in the summer. The flat lines with very few vertical lines make the photo more tranquil. You can use this technique when you want to make your photo more “relaxing”. Simply look around and see if your photo has lots of vertical or horizontal lines. If it has too many vertical lines try moving back or positioning yourself so the horizontal lines outweigh the vertical lines.
There are common examples of photos with lots of vertical lines but the horizontal line is stronger, making the photo peaceful. Think of a shot of a forest with thousands of vertical trees. The horizon that connects all the vertical lines dominates and makes the scene less “energetic”.
Tip #4 – Use Vertical Lines
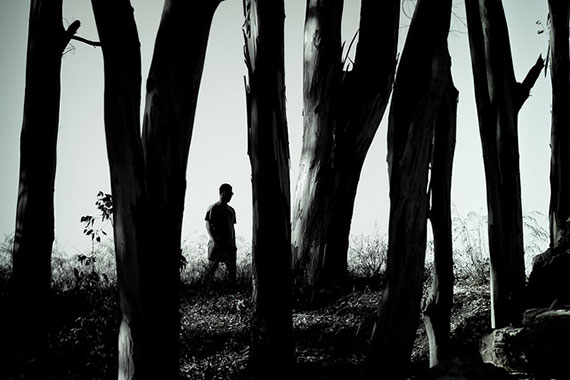
The opposite can also be used with vertical lines. Instead of photographing a scene where the forest has a large horizontal line, get up close to one tree and use the height of the tree as a large dominant vertical line. Now the entire feel and energy of the picture has changed.

Photo by Hernán Piñera
This is also effective for skyscraper shots. A shot of many buildings with a large horizon line makes the scene look more mellow. Get close and shoot up at one particular building (augmenting the vertical lines) and suddenly the photo has lots of energy.
Tip #5 – Use Empty Space
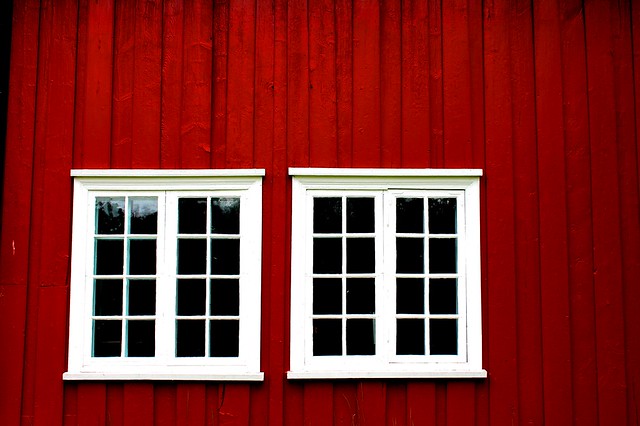
One very effective technique to use for photography is empty space. Many times people that don’t know anything about photography try to fill the entire image with stuff. This often creates cluttered and images that are not pretty.
Solution: Use space. Don’t be afraid of leaving empty space around your subject.

“Windows Molde Norway abstract” captured by Les Haines
Tip #6 – Isolate
Very similar to the last tip, isolating your subject also can make photos quite interesting. Most people that take photos just take snapshots of everything. They don’t take time to get up close or zoom into a particular object/subject and isolate it from the surrounding environment. Try this: next time you’re taking photos somewhere pick a few objects and isolate them. Then, be sure the background is not cluttered. This can be done by using a shallow depth of field or simply positioning yourself so the background has empty space. Often times getting lower works great for this as you make the background the clear blue sky (plenty of empty space).
Tip #7 – Shoot During Sunset and Sunrise
One of the most useful tips that can get your photos looking great is shooting your photos only during sunset or sunrise until you start getting better. During these times the light outside is crisp. The atmosphere gets a nice atmospheric glow of colors in the sky that makes it pretty hard not to take a decent landscape shot.

Photo by Lukas Hofstetter; ISO 100, f/22.0, 4-second exposure.
Try only taking photos in the afternoon and in the morning. Avoid shooting when the sun is directly overhead. This produces harsh shadows that don’t work well for most average scenes. Of course, overhead lighting is great for certain scenes and accentuates details…but that’s for another post!
About the Author:
Simon Takk, creator of phototechniques, shows others how to open their eyes to the breathtaking photo opportunities all around them.
Like This Article?
Don't Miss The Next One!
Join over 100,000 photographers of all experience levels who receive our free photography tips and articles to stay current:


Wow, thanks for these great ideas. I’m new to photography … well with a good camera.. any tips are gratefully accepted. Hope to share some of my pictures..
Hi,
its very good tutorial …
I had a similar case with a big problem, now I finally know how to do it
Thank You
I would say well done on explaining the rule of third’s. There are various articles on this site & all over the internet trying to explain the rule of thirds in various forms & example – but I must say how you have explained it is the most simplistic way even a beginner can understand..
Overall, this article is perfect from amature to pro – as I think if we able to keep half of the key points in mind – the result would be awesome ! Good work…
What are the elements that make an effective photograph?