Photography is a form of art that allows you to freeze a moment in time, to capture a view, a mood, or a perspective. One of the most rewarding forms of this art is skyline photography. It presents an opportunity to capture the soul of a city, showcasing the juxtaposition of nature and man-made structures. If you’re interested in venturing into the world of skyline photography, here are some invaluable tips to help you produce awe-inspiring images.
1. Golden Hour and Blue Hour are Your Best Friends
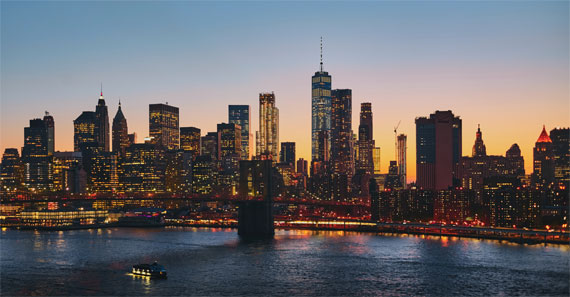
The time of day can significantly influence the tone and mood of your photographs. The golden hour, which is the first hour after sunrise or the last hour before sunset, offers a soft, warm light that brings out the nuances in colors and textures. On the other hand, the blue hour, the period just before sunrise or just after sunset, imbues your photographs with a dreamy, cool light that can lend a surreal quality to cityscapes.

Photo captured by Luca Bravo; 1/8 sec, ISO 400
2. Gear Up
A sturdy tripod is essential for skyline photography as it allows you to stabilize your camera, making it possible to use slower shutter speeds without introducing camera shake. A DSLR or mirrorless camera would be ideal due to their manual control and high-quality image sensors, but advanced compact cameras or even smartphones with manual modes can also do the job. Wide-angle lenses can help you capture the expansiveness of the cityscape while a telephoto lens can allow you to zoom into specific elements of the skyline.
3. Composition is Key
One of the fundamental aspects of skyline photography is good composition. Remember the rule of thirds and try to place interesting elements along the lines or at the intersections. Use leading lines to draw your viewer’s eye into the photograph. And don’t forget to consider vertical compositions too – these can often be more dynamic and interesting than standard horizontal shots.
4. Get the Right Exposure
Getting the right exposure in skyline photography can be challenging, particularly during twilight when the light is changing rapidly. Practice shooting in manual mode and make use of your camera’s histogram to ensure that you’re capturing the full range of tones. Bracketing shots and using High Dynamic Range (HDR) techniques can also help balance the exposure between the sky and the city lights.
5. Consider Long Exposures
Long exposure photography is perfect for skylines. It can turn bustling cities into tranquil landscapes and allow you to capture streaks of moving light, adding an artistic touch to your image. With your camera on a tripod, try using a slow shutter speed, a small aperture (large f-number), and a low ISO to capture a detailed, sharp image.
6. Scout for Unique Locations
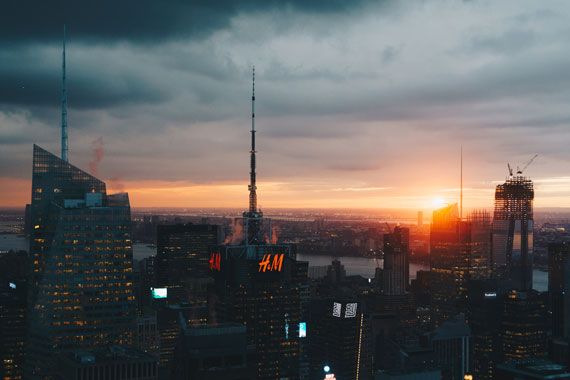
Look for unique vantage points that will give you a fresh perspective of the cityscape. This could be a rooftop, a hill, a bridge, or even the window of a tall building. Explore the city and its outskirts – sometimes the best views are found where you least expect them.

Photo captured by Juan Di Nella; f/5.6, 1/100s, ISO 800
7. Be Patient
Skyline photography requires patience. The perfect lighting conditions can be fleeting, and you may have to wait for hours for that perfect shot. But remember, the most stunning photographs are often those that are the hardest to capture.
8. Utilize Panoramic Techniques
Incorporating panoramic techniques can elevate your skyline photography by capturing a broader field of view. To capture panoramic shots, you will need a sturdy tripod, a panoramic head for precision when rotating the camera, and a good wide-angle lens. Shoot in manual mode to keep exposure and focus consistent throughout your sequence of shots, and overlap each shot by about 30-50% for smoother blending.
Shoot panoramas vertically to capture more sky or foreground, resulting in a higher resolution image. Use software like Adobe Lightroom or Photoshop to stitch your images together, creating one seamless panoramic photo. Remember to consider your panorama’s final output, ensuring high resolution if you plan to create large prints.
9. Utilize HDR Techniques
High Dynamic Range (HDR) techniques can be incredibly effective during the golden hour and at night for skyline photography. During this time, the contrast between the bright sky and the dark buildings can be extreme, often exceeding the dynamic range of your camera’s sensor. The shadows cast by buildings are deep, while the highlights in the sky can be intense, making it challenging to capture detail in both areas in a single shot. This is where HDR comes into play.
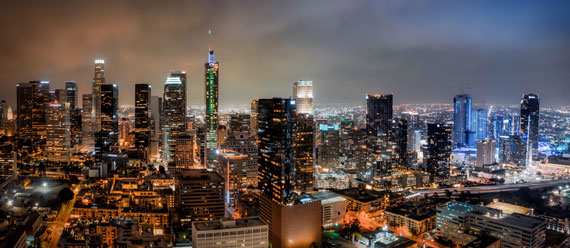
HDR techniques involve taking multiple exposures of the same scene – typically an underexposed shot, a correctly exposed shot, and an overexposed shot. These images are then blended together in post-processing, producing a single photo with detail in both the shadow and highlight areas. By leveraging HDR techniques during the golden hour, you can capture the full tonal range of the scene, from the deepest shadows of the buildings to the bright, vibrant hues of the sky. This can lead to more detailed, balanced, and visually stunning skyline photographs.

HDR skyline captured by Venti Views
10. Post-Processing Matters
Try adjusting the exposure, tweak the colors, and sharpen the details (Sharpen AI can help) to enhance the overall mood of your image.
In conclusion, skyline photography is a fascinating way to capture the spirit of a city. It requires technical skill, creativity, and patience. But with the right approach, you can create stunning images that tell a story about the place and the time.
Like This Article?
Don't Miss The Next One!
Join over 100,000 photographers of all experience levels who receive our free photography tips and articles to stay current:


Leave a Reply