ISO, as it relates to digital photography, is an indicator of how sensitive to light your camera’s sensor is, and most digital cameras allow you to adjust this sensitivity. The majority of low to mid-range digital cameras have an ISO range that goes from somewhere in the neighborhood of 50 or 100 up to around 400 to 800. The lower the ISO number, the more light that is necessary to get proper exposure on a given shot.
So why not crank the ISO setting all the way up to the max and be done with it? Although this would allow you to get good exposure even in low light situations, there is a catch. The higher you set the ISO, the more “noise” there will be, causing your pictures to come out grainy looking. FYI, the camera’s “auto” setting doesn’t always choose the lowest ISO possible.
These days a good number of digital cameras employ some form of noise reduction at higher ISO settings. Unfortunately digital noise reduction is accomplished by applying a slight amount of blur to the image, which not only blurs out some of the noise, but also blurs out some of the fine detail.
All things considered, the best way to approach ISO is to use the lowest possible setting, but don’t over do it—using too low an ISO setting can result in blurry images caused by “camera shake”.
Assuming that you are using a camera with an ISO range of 50 to 400, here are some rule of thumb examples:

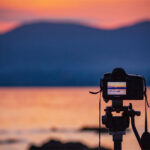
However, there is a way to avoid using your higher ISO settings, even in low light—its called a tripod. This three-legged wonder allows you to keep your camera perfectly steady, which eliminates the blurry images caused by camera shake.
Another option to keep your camera steady during low light shots is to set your camera on a stationary object (like a rock or the hood of your car) and use the self-timer. This feature allows a few seconds lag between the time you press the shutter button and when the camera takes the picture.
Remember, keeping those ISO settings as low as you can, will give you clearer, cleaner photos.
For more digital photography tips, visit my web site: http://www.jeffgalbraithphotography.ca
Like This Article?
Don't Miss The Next One!
Join over 100,000 photographers of all experience levels who receive our free photography tips and articles to stay current:


Thank you very much for this helpful information. I own a Lumix and automatically set the ISO to the highest setting since I’m always capturing moving targets. Now I’ll try differently, and I’ll be checking back for other links and tips.