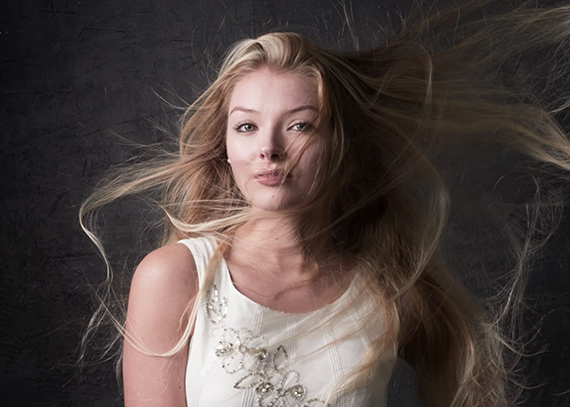
A sense of movement can make for dynamism and excitement in a still photograph. Unfortunately for many photographers working in small studio setups, movement often isn’t conducive to the stationary lighting and limited space available.
One way of creating the feeling of movement in an image while keeping a model perfectly in place is through introducing “wind” to a portrait scenario. Though photographers obviously don’t have the power to bring a gentle natural breeze indoors, Gavin Hoey reviews a few different techniques that artists can utilize to replicate the effect:
Here’s a brief overview detailing four of the most common ways of creating a windy setting inside of any home studio.
1. The Flapper

This first way of directing airflow is simple enough. By using a large board, reflector, or similar flat, lightweight object, it’s possible to create “wind” by simply flapping up and down. If you can synchronize your camera’s shutter with the movement of the flapper, this method can be surprisingly effective. However, there is one obvious drawback. Since it’s impossible to man a camera while effectively working the flapper up and down, this technique absolutely requires the presence of an assistant.
2. The Hair Dryer
There’s an element of convenience to using a hair dryer as a device to simulate wind. Nearly everyone has one lying around their house somewhere, and the only set up they require is a power outlet and the flick of a switch. But, much like the flapper, the use of a handheld hairdryer requires an assistant on hand. In addition, the results attained by a hair dryer aren’t nearly as dramatic as those attained with other methods. In fact, the hair dryer must be placed almost directly next to the model for any visible effects to take place at all.
3. The Fan
An electric fan is a convenient way of bringing a controlled and consistent breeze on set without the use of a second set of arms. Small enough to be moved around or positioned directly in front of the camera without interfering with the frame, a fan still packs enough punch to create the windswept results many photographers strive for. Using a fan is a budget-friendly solution to bringing movement to the scene.
4. The Wind Machine
The most powerful of the four techniques listed, wind machines are guaranteed to create visible results. As seen in Hoey’s examples, the power of the wind machine is great enough to impact the surrounding materials and props that a model may have on hand. For photographers seeking dramatic visual results, a wind machine is an excellent choice. However, bringing one into your studio can be quite an investment. Compared to the other options presented, a wind machine costs significantly more.
“If like me, you work in a small home studio, you know that if you want movement—it can be quite tricky because you’re limited with space. However, if you’ve got a model with floaty hair or wearing floaty outfits, then you can create movement by creating a breeze.”
Like This Article?
Don't Miss The Next One!
Join over 100,000 photographers of all experience levels who receive our free photography tips and articles to stay current:


Leave a Reply