Have you decided to buy your first professional camera and want to make a name for yourself as a photographer? Or maybe you just wish to learn how to edit photos for your own albums? With these eight simple photo editing tips for stunning photography, you can take your photo work to the next level.
When it comes to post-processing, Lightroom, Adobe Camera Raw, and Photoshop are professional photographers’ favorites. That’s why I’ve decided to offer a few useful tips on these most popular photo editing programs. So, without further ado, let’s begin our list of photo editing tips that will upgrade your amazing shots.
1. Speeding Simple Processes
Without a doubt, one of the main issues concerning photo editing is the workflow. Sometimes having to edit even just a couple of photos can turn into hour-long efforts. The process of opening, editing, and saving can become a pain.
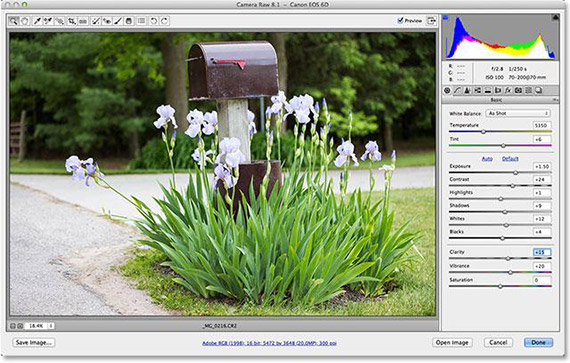
Lightroom and Adobe Camera Raw simplified this process by utilizing a series of shortcut keys. By pressing the ‘Cmd+C’ or ‘Ctrl+Shift+C’ (for Copy options) and ‘Cmd+V’ or Ctrl+Shift+V’ (for Paste settings) commands, Lightroom’s software helps to save a lot of time for such remedial tasks.
2. Camera Raw Filter
Photoshop CC has the option of enabling the Camera Raw interface. As such fast layer editing can be done in Photoshop. Simply select the layer, then go to Filter > Camera Raw Filter.
In order to return to the Camera Raw Filter at any time to fine-tune the photos, first convert the layer to a Smart Object using Filter > Convert for Smart Filters. This will prevent destructive edits.
3. Learn About Camera and Lens Adjustments
It’s best to begin with learning some of ACR and Lightroom’s panels before engaging in Basic adjustments. For example, before you make any substantial changes to color and contrast, check the Camera Calibration panel.
The Lens Corrections tab and the Enable Lens Profile Corrections option are worth checking out. Especially if you use wide-angle lenses, the automatic lens adjustments might push some areas of the image out of the frame. It’s a good idea to check these before cropping the image.
4. Make Use of Various Shortcuts
I simply cannot stress this enough. Not only does it save you time, but it also offers a better command of the software.
One of the most used tools, the zooming can be simplified by pressing and holding H. In Photoshop this will create an instant zoom. You can also hold the space bar to temporarily switch to the Hand Tool, dragging the image around to verify details in other areas.
5. Create More Vivid Skies
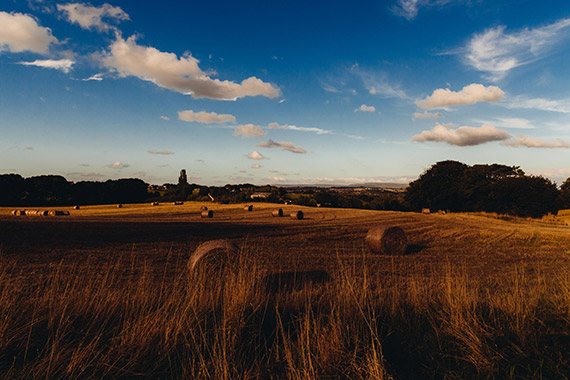
By utilizing the HSL option in Adobe Camera Raw or Lightroom you can give a subtle boost in contrast between a blue sky and a cloudy one. To do so, select Luminance and then drag the Blue slider to the left to darken the sky. Do not over use it, however, or the edges of the clouds and other objects might intrude into the sky.
You could employ various other techniques such as applying a digital Graduated Filter, boosting the Clarity or Curves or increase the Vibrance or Saturation. Another useful option is the Targeted Adjustment Tool, which can be used directly on the image. Simply select it from the ACR toolbar or by clicking on the ‘bullseye’ icon at the top of the HCL panel in Lightroom. Afterwards simply click and drag on dark areas.
6. Stylizing Photos
If you wish to apply a more stylish look to your photographs the following steps might prove useful.
- Begin by uploading your photo in Photoshop and select the Brightness/Contrast panel.
- Adjust Brightness to +25 and Contrast to +35. Set Saturation to -25.
- Then adjust the Curves layer.
- You can first choose Red. Select and drag down a little the center of the red line.
- Then move the Blue line upward.
- Lastly select and move up a little the Green bar.
- Finish by selecting the Soft Light blending mode.
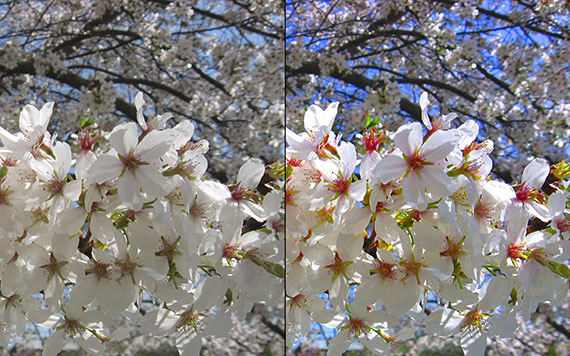
To complete, we just need to add two Solid Color adjustment layers. Select a pale yellow color and then set its blending mode to Overlay. Set Opacity to 35%. For the second color layer you can type ‘f000ff’. Select Screen as its blending mode and Opacity to 30%.
7. Experiment with Preset Settings
The Presets Panel is located on the left of the interface after you click on the Develop Module. The color presets found there are excellent for experimenting. If you find yourself in a pinch and need to undo an effect, safely scroll down to the History palette. There you can click back through history states. Make sure you go to Lightroom Effects Presets and select Light Grain.
8. Be Selective when Using Apply Levels
Adjustment Layers have the feature of being accompanied by a Layer Mask. This can be helpful when hiding parts of the tweak. By simply selecting the Brush tool and continue painting over tweaked parts with black. You can also employ the command Cmd/Ctrl+I to make the Layer Mask black, then paint with white to reveal the tweak.
By applying these Levels as Adjustment Layers you can therefore mask to restrict the effect to certain areas of the image.
There you have it, a short list of tips for photography enthusiasts wishing to improve their editing skills. I hope my article proves to be enjoyable and useful to you. For more tips on how to make spectacular photographs be sure to check out more interesting photography tips and techniques on picturecorrect.com.
I always encourage my readers to search for inspiration. The web is such a resourceful tool when it comes to editing tips and ideas. If, for instance, you are looking for creative editing tricks to improve your landscape photography, check out this post on virtualphotographystudio. Street photography is another popular niche. You can have a look at this article on picturecorrect.com and learn how to create stunning urban landscape photography.
If you liked my post or want to share any other tips and creative ideas, feel free to leave a message. Feedback is always welcome. Cheers!
About the Author:
Poetry lover and coffee addict, Geta is a photography enthusiast always looking for inspirational topics to write about. She loves providing her readers with creative tips and ideas, as well as keeping them updated on useful resources designed to ease their effort. You can follow her posts on VirtualPhotographyStudio.
Like This Article?
Don't Miss The Next One!
Join over 100,000 photographers of all experience levels who receive our free photography tips and articles to stay current:


best images editing software i love them
Am going to start my trial soon when I get a computer
Nice tips. I cant wait to try these new features. Keep Posting.
Here is My Work Plan and Process:
Elimination of all the imperfections
Correcting color, brightness, contrast and saturation, and exposure
Fixing any issues like crooked horizons, distortion, dust spots
Remove blemishes, smoothing wrinkles, and fix makeup
Whiten Teeth, Enhance eyes, lips, and other features
Removing stray or flaw hair, Re-shape eyebrows and eyelashes
Add volume to eyelashes and hair gaps
Any improvements or changes to fit the image for overall realistic look
Use Dodge & Burn, and Frequency Separation for High End Retouching
these are the best images editing softwares i love them
I think using hd images to edit is very important for beginners.
Gonna put these in a smaller list and add a check box next to each!
Thanks for these editing tips. I don’t have very much experience, so I’m going to try and use these.
Nice article, especially enjoyed your tip #6, great mini manual.
Hello Geta,
Thanks for your article, its really interesting. Light room really create something very interesting. I really like to work on Lightroom a lot. Recently i worked with getty image and my company used light room and Photoshop both. Lots of people now know how to edit image but everyone is not that much skillful but this kind of article really help everyone to improve i hope. Ok i have a question to you- Lost of people are working as an editor but if they got work like, they have to process 500 image in a day what will they do? Do you have any suggestion about that?
Thank you
All the 8 tips of photo editing are great. I specially liked the 7th one. I love experimenting. You can get some great photos by experimenting.
Great content! It is very helpful for photographer and Photoshop editor. Thank you sharing this content.
Wow, This is a great blog for photo editing tips for the stunning photographer. It’s helpful for a beginner. Thanks, shearing this.
All the best.
this is a really best photo editing tips. you have described a perfect idea. I have more benefited from this post. thank you so much. but i need an idea about this work. tell me that its really easy process?
Thank you for sharing this article. Amazing tips for editing photo
Thank you for your nice article Geta. Its really helpful for someone looking to do basic editing on their photos. People use smart phones these days and there are lots of free apps people can use to perfect their photos. What is your opinion about professional photo editing ?
thanks for nice share about this great collection! especially enjoyed your tip #6, great mini manual.
You have reviewed 8 photo editing tips for stunning photographs. I love your writing content and that is really effective for the photographer. I also want to add some more tips regarding photo editing from your content and my idea that might help photographer.
1. Flattening out the Image in Raw
2. Using the Healing Brush
3. Using the Clone Stamp Set to Lighten or Darken
4. Learning How to Dodge and Burn
5. Frequency Separation
6. Black and White Layer Changed to Soft Light
7. Toning Using the Color Balance, Levels, and Hue/Sat Adjustment Layers
8. Crushing Highlights with Curves
9. Using Layer Masks
10. Using Different Blending Modes
This is good content, thanks for sharing.
Thanks for this crucial tips,
best tips to edit a photo
really excellent explanation to make stunning image effect. I admired it.
It would be helpful if lessons could be easily printed. That is, put a PRINT button somewhere.
Hi Stuart,
Glad you enjoyed my article and thanks for bringing this to my attention. Curves adjustments affect both contrast and color saturation. Color adjustments allow you to improve color intensity in a pic, while the Soft Light blending mode keeps the lightness values under control. By applying the suggested edits you can achieve brighter and deeper colors, thus sharper results.
Hope this helped.
Geta
Interesting article but in point 6 you neglect to say why you are suggesting the edits you do and what they will achieve…