This article is based on concepts from the Better B&W Photography Guide which is currently on sale.
There are two essential skills you must develop to become great at black and white photography.
The first is learning to see—to identify—a great black and white subject. Some subjects demand to be rendered in color, and others scream for a black and white treatment.
The second skill is taking the necessary and precise steps to convert a color image file into black and white. Yes, some cameras allow you to originate your picture in black and white. However, that’s not recommended. You have given up control over how the colored hues will be rendered into shades of gray.
In this article, we will discuss the following skill points:
- Choosing a proper black and white subject matter
- How to identify tone value in a scene
- Composing in black and white using light, shadow, shape, contrast and texture
- How colors convert to black and white in photography
- How to properly expose for black and white photography
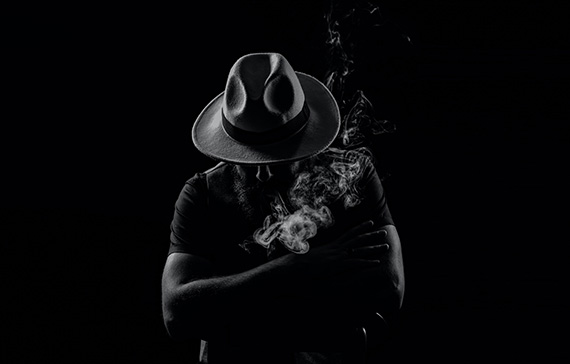
Photo by Shahin Khalaji
Black and white photography relies on tone (light to dark shades of gray), as there are no color contrasts to compose in your picture.
Remember this: When searching or deciding on a subject for black and white photography, look for the following:
- Intense light and dark values within the scene
- Dominant shapes and lines
- Light to dark contrast
- Noticeable and revealing texture
The example photograph above hits every one of those bullet points. Now, let’s examine each concept separately.
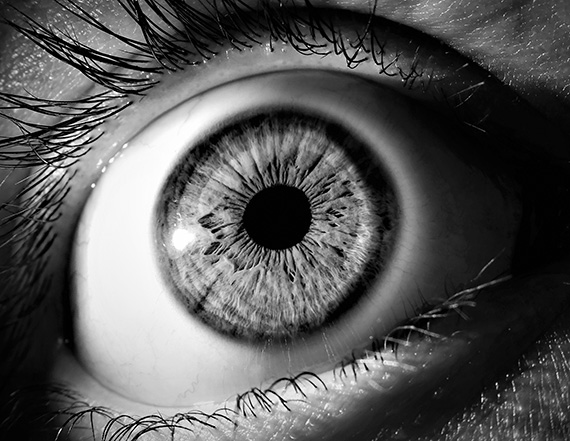
Photo by Aline Berry
A photograph such as the one above gains its visual power through tone and shape. The elimination of color forces viewers to explore the outward repeating and radiating patterns of dark and light tones. It also emphasizes the darkness of the pupil.
Imagine if the cornea of this eyeball were blue. It would steal the show, and the rest of the compositional elements would be significantly reduced in their impact. A viewer would home in on that bright blue color versus the whole of the eye.
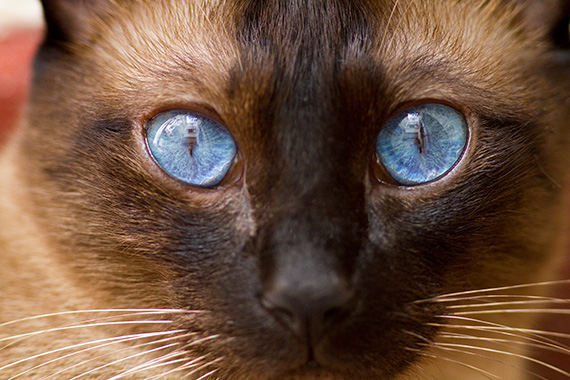
Photo by Kent DuFault
What do you see when you look at the photograph above? You can’t see anything but the blue eye color. Right? The cat’s face practically disappears.
The close up of the human eye was a perfect subject for black and white photography because there are strong light and dark values within the frame. There are dominant shapes. Plus, there are light and dark contrasting lines.
Critical Thought: If the eye cornea was bright blue (such as in the cat photo), and the picture was rendered in color, would that be a bad photo? No—it would merely change the dynamic of the final image. The picture of the cat’s eye picture isn’t bad. I think it’s rather good. It’s a matter of what message you the photographer want to communicate to your viewers. What if the eye color was a dark brown? Would that change its value as a black and white photograph? Good question. I’ll address that momentarily when we discuss color conversion.
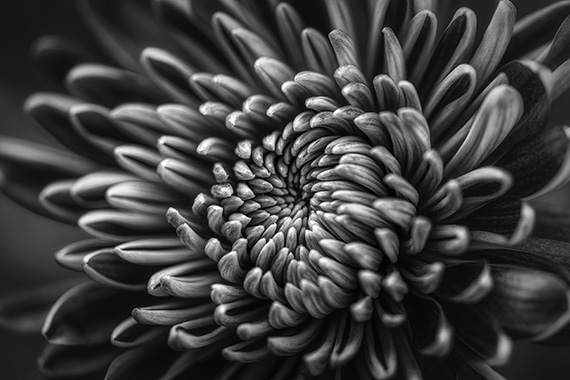
Photo by Carlos Quintero
Try This: When determining if a subject might be best produced in black and white or color, ask yourself, “What is the element I find interesting here—a shape, line, contrast, shadow or texture?” If the answer is yes to any of these, the subject is likely a good candidate for a black and white photo. Now ask, “Is color important to the message?” If the answer is no, then you have an excellent candidate for black and white photography.
Let’s consider the flower photograph above. It would have been beautiful as a color photograph as well. But what interested the photographer was the shape and the repetition of form.
By choosing the black and white presentation, the photographer communicated what they found most interesting about this flower. They’ve isolated the essential component!
Critical Thought: When shooting black and white film, the photographer is forced to make all these considerations while taking the picture. As a digital photographer, we have leeway to make these considerations after the fact.
Pro Tip: If you have trouble seeing in tone versus color, buy yourself a pair of sunglasses with the absolute darkest lenses you can find. As you try to determine the levels of tone in a scene, put the sunglasses on. They will help eliminate color and you will see the scene in shades of tone.

Photo by Shahin Khalaji
The image above is an exquisite use of texture in black and white photography. The texture would be completely overwhelmed in a color photograph. It would still be there—however, the color of the model’s eyes, skin and nails would overtake the texture as leading points of interest.
When you look at this photo, what do you notice first, and then where do your eyes return to linger? It’s the texture of her skin!
I think the texture is the magic element in this portrait. It humanizes this woman.
Now that you’ve learned what elements to look for in a black and white photography subject, and how you can better communicate a specific type of message with black and white photography, let’s talk about the second skill—the conversion process of turning color to black and white.

Graphic by Kent DuFault
When color is converted to black and white, the conversion process considers the tone and not necessarily the hue. This means greens, blues and reds of the same approximated tone can convert to the same approximate shade of gray in black and white.
A bit of nostalgia
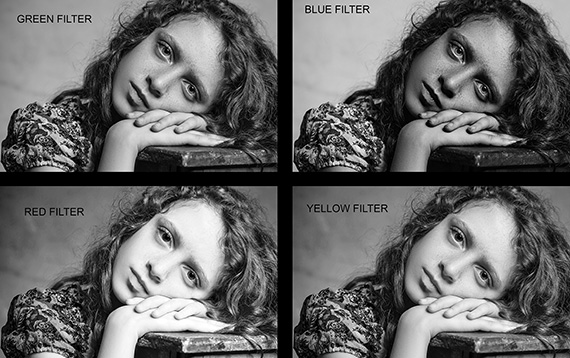
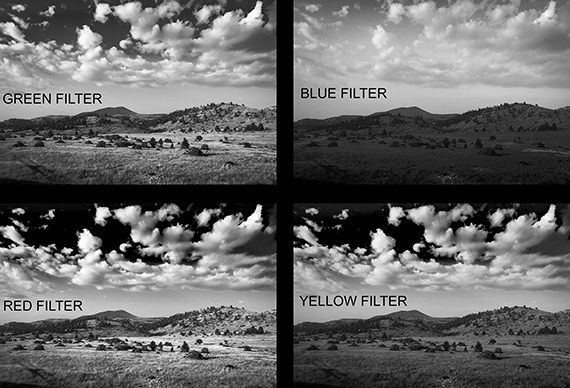
Black and white film photographers use colored glass filters on the front of the lens to control how the film would behave toward the various colors of the spectrum.
- Red filters block blue and green, darkening blue skies and lightening red objects such as flowers
- Green filters block red, lightening green objects such as foliage while darkening red flowers
- Blue filters block red, yellow and orange; blue subjects, such as the sky, will lighten, while red objects will turn almost black
- Yellow filters block blue, darkening blue skies for better contrast to clouds, and lightens red, orange, green and yellow subjects. This filter is often used to lighten skin tones in black and white portraits
- Orange filters work similarly to yellow—blues become darker and all warmer tones appear brighter than green
Consider this: It’s essential to understand how colored filters work on black and white film. You will use that same knowledge to convert your digital color files to black and white!

Photo by Shahin Khalaji
Let’s take this full-color image and convert it to black and white while applying the different filters to see how the image is affected.

Black and white conversion
This first example is a black and white photograph—with no filtration or adjustment by me—as determined by the Photoshop algorithm.
Below, we have the same picture with four different filters applied during the conversion. It’s pretty clear how a color filter can change your black and white image.
Filters
Let’s look at another example with a different type of subject matter:
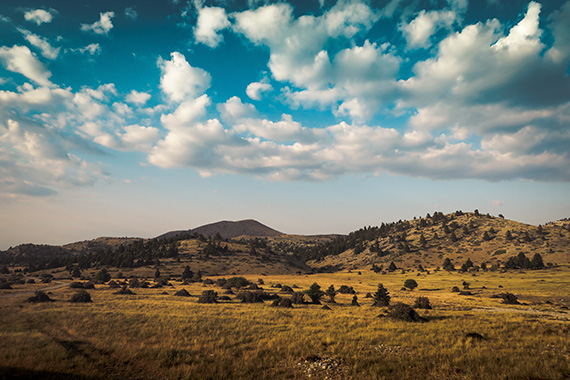
Photo by Jason Blackeye
The above image is our full-spectrum color landscape image. Below, we have a black and white photograph, with no filtration or adjustment by me, as determined by the Photoshop algorithm.
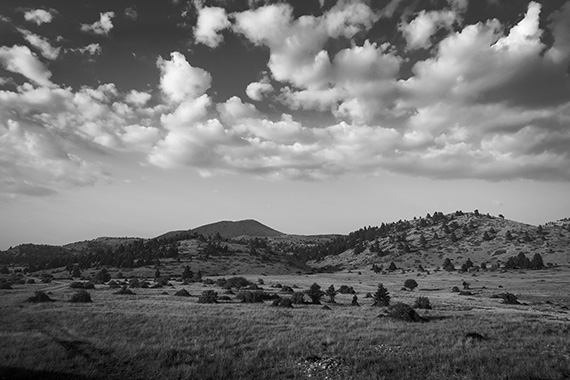
Black and white conversion in Photoshop
Knowing how color filtration will affect your black and white conversion is critical to producing pro-level work in black and white photography.
Filters
This is why I am not a fan of presets or actions for black and white conversions. There is too much at stake to leave the decisions up to a computer.
Now, let’s return to the photograph of the Siamese cat for an exciting comparison experiment.
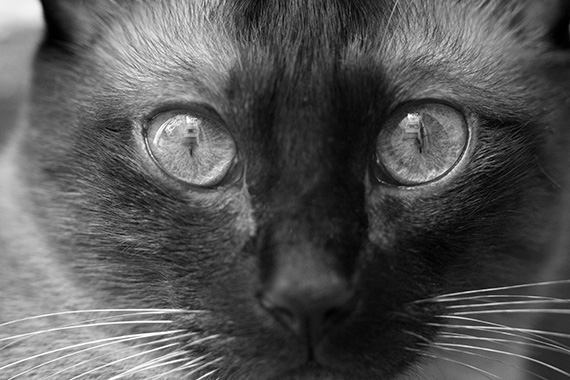
Black and white
Let’s say I wanted to convert this color picture to black and white, but I still wanted to emphasize the eyes. This first example, above, is a default conversion. As you can see, the software went for a broad range of tones with little emphasis placed anywhere:
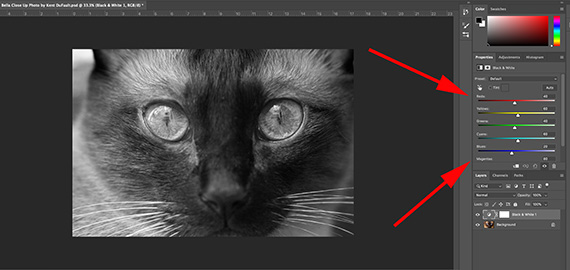
Adjusting sliders
This screenshot is what the default conversion looks like in Photoshop using the black and white adjustment layer feature.
Notice the various sliders with different colors. These have the same effect as the colored-glass filters we discussed earlier.
The algorithm of the software has decided what would be the best settings for those six sliders.
What the software doesn’t realize is that I would like to emphasize the eyes of the cat. So, I need to put my creative input into this conversion.
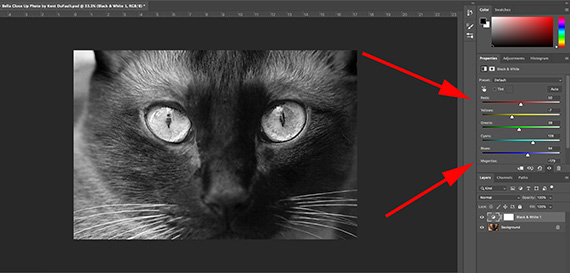
Emphasizing eyes
Having my intent for the photograph established, I moved the filter sliders until the eyes became emphasized through the tone conversion.
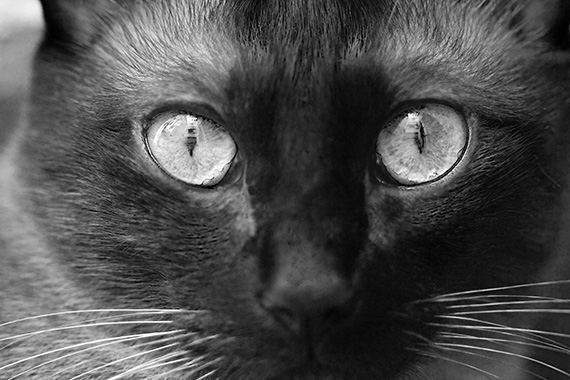
Conversion with eyes emphasized
Above is my photographer-approved conversion of the color image file.
Let’s look at the two side-by-side.
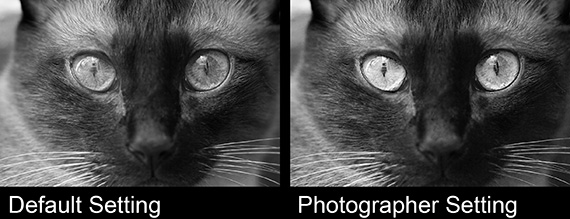
Default vs custom
You can see a vast difference. My understanding of color to black and white conversion has improved this photograph and cemented my intent into the minds of my viewers.
Proper exposure in black and white
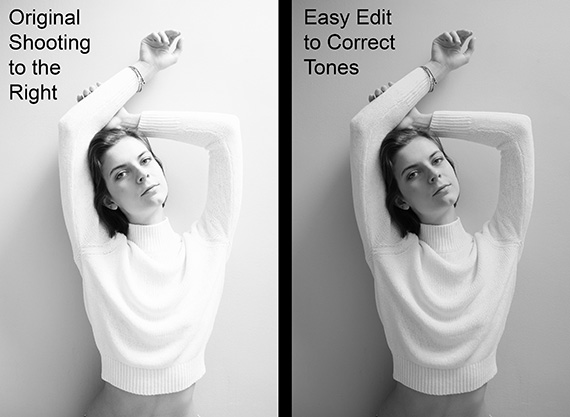
Original photo by Andreea Chidu
Have you heard of the phrase, “Shoot to the right”?
Shooting to the right tells us that an overexposure error is better than an underexposed one.
Shooting in RAW makes this statement even more accurate.
The phrase also references the camera’s histogram, where—on the right side of the scale—all the highlights and whites are located.
And in black and white photography, it’s essential to bear this advice in mind as the finished photograph has only tone to rely on.
Lost shadow detail is lost. End of story. This should only be the case if the effect that you’re striving for: deep, dense blacks with no detail.
Practice shooting to the right in your exposures.
The example photos of the model clearly illustrate how effectively the highlights can be adjusted in post-processing with a RAW file.
Let’s recap!
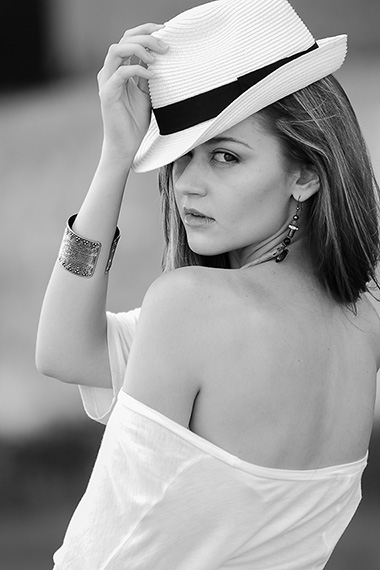
Photo by Melancholia Photography
The best subjects for black and white photography have bright whites, deep blacks and a full range of tones in between. An inexpensive black and white viewing filter, such as sunglasses, will teach you to see in “tone” versus color.
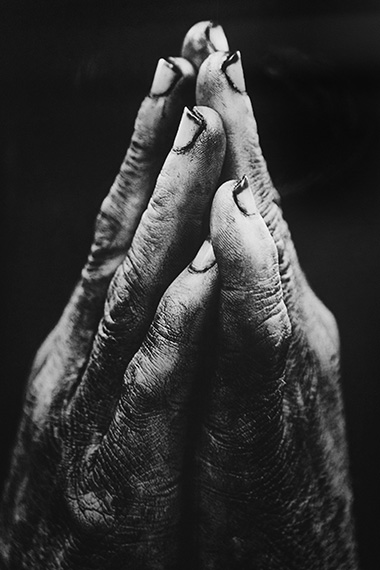
Photo by Nathan Dumlao
Great subjects for black and white photography will often display strong shapes and textures.
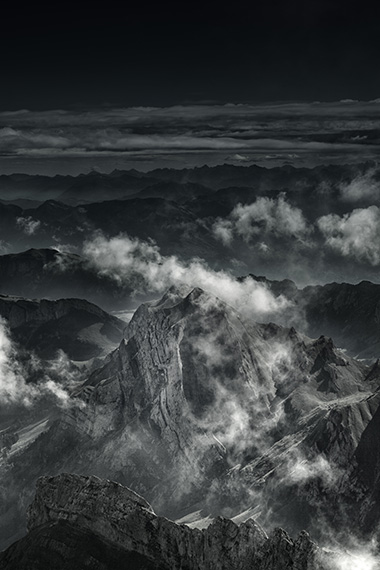
Photo by LoboStudio Hamburg
Vastly different colors can convert to very “similar” tones. When converting to black and white, try and separate the tonal values of different color channels.
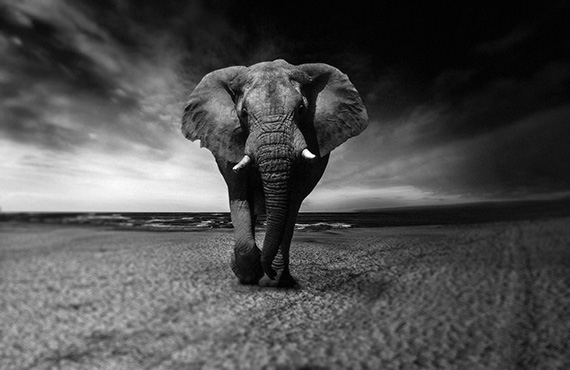
Photo by Christine Sponchia
If the color values present in a scene aren’t particularly interesting, look to black and white as an alternative—only if the scene offers distinct tonal values, textures and/or intense shadows.
Pop Quiz
What filter darkened that sky in the elephant photo?
Now it’s your turn!
Take an afternoon and go for a photo safari. Your assignment is to hunt down subjects that meet the criteria discussed. For each shot, establish your intent for the photo. Write it down, so you don’t forget.
Photograph your chosen subjects while remembering to shoot to the right.
Now convert your color files to black and white using what you learned about color filtration, while emphasizing your original intent.
Have fun!
About the Author:
Kent DuFault is an author and photographer with over 35 years of experience. He’s currently the director of content at the online photography school, Photzy.com.
For Further Training:
Have you ever quickly converted your shots to black & white, hoping to make them “Better”? And the result was bland to say the least? This is a very common occurrence. Knowing how to convert color to B&W with a working understanding of tone and contrast in post-processing is a very different story. This in-depth eBook is designed to cover EVERYTHING you need to know about producing your own powerful and professional B&W images.
Every step is detailed in all three programs: Photoshop, Lightroom, & Elements. But even if you don’t have these applications, there’s enough information in here to help you achieve the same results with the software you already have. It is currently 76% off if you want to check it out.
Deal ending soon: The Better Black & White Photography Guide at 76% Off
Like This Article?
Don't Miss The Next One!
Join over 100,000 photographers of all experience levels who receive our free photography tips and articles to stay current:


Leave a Reply