Camera manufacturers continue to invent new ways to make photography easier for us. One of these ways is to have a wheel of preset functions to dial in when we encounter varied photographic situations. For most people, they either don’t fully understand what the wheel symbols mean or they simply misunderstand what they mean.

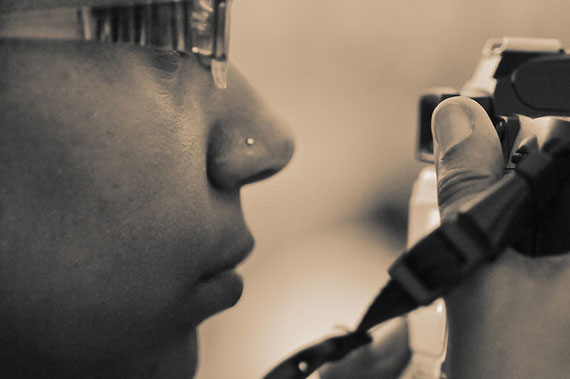
Photo by Ben Alman; ISO 3200, f/3.2, 1/100-second exposure.
Let’s explore each of them so you can be more confident when using your camera and achieve the exact results you’re looking for.
What Do the Symbols on My Camera’s Function Wheel Mean?
First, I’d like to give you a quick tutorial on the basics of an exposure. This remains the same for film as well as digital cameras. The physics of photography require two things to achieve a proper exposure. Yes, both. Not one or the other. The law of physics require they both to work in conjunction with one another.
- The first is an aperture. An aperture can be explained as how large the hole is when it opens up to allow light into the camera. Think of it in the same way the human eye functions. Aperture sizes range from very small to very large. Large apertures are used in low light conditions to increase the amount of light coming into the camera. Conversely, small apertures are used to limit the amount of light coming into the camera. Apertures are expressed as “F”, followed by a number. For example, F2.8, F4, F5.6, F8, F11, etc. The SMALLER the number the LARGER the hole. The LARGER number, the SMALLER the hole. This seems counter-intuitive but true.
- The second is a shutter. Shutter speeds are explained as how long the aperture stays open. It is expressed in fractions of a second. For example, 1/1000 of a second, 1/500 of a second, 1/250 of a second all the way down to whole seconds, which are rarely ever used. The larger the number the faster it opens and closes. The smaller the number, the slower it opens and closes. The longer your shutter stays open, the more light will collect on your image. By the way, some cameras display these fractions with the denominator only (bottom number) such as 1000, 500, 250, etc. Some cameras display both the numerator and the denominator, such as 1/1000, 1/500, 1250, etc.
The functions below are taken from a Nikon Digital SLR camera. Even if you don’t own a Nikon, many of these functions are very similar with most camera brands. I suggest you have your camera while reviewing these functions.
- “S” – Represents “Shutter Priority”, NOT “Sports” as some people assume. Shutter Priority means you control the speed of the shutter – how long the shutter stays open. While the shutter is open, it will record anything it sees. When you keep your eyes open, you see continuous movement of objects. If you open and close your eyes very fast, you’ll tend to see a freeze frame of that object. Think of a strobe light in the dark. With a strobe, you don’t see movement, only a collection of still images, even when the subject is moving. Therefore, if you use a slow shutter speed, you can get blurry images for this reason. However, when you use a fast shutter, you can stop action. Generally speaking, you would choose a fast shutter speed for sports, speeding cars, dancing, etc. If you don’t want to freeze action, slow your shutter speed down and you may see the hem of a dancer’s dress moving (or blurring) to communicate movement in your images. This function will allow you to control how much movement you see in an image. Flash can also freeze images under certain circumstances, but that’s another lesson. The other function a slow shutter speed will offer is to pick up ambient light in the background when using flash. Have you ever taken a picture in a church but the background is so dark that no one knew where you were? Go to “S” and slow your shutter down. You’ll find the background begins to develop on your image. Practice dialing in “S” and find an index finger or thumb wheel close by and watch the numbers change. Practice taking the same image with different shutter speeds and observe the differences. In this function, you control the shutter, but the camera will choose the corresponding aperture to achieve a proper exposure.
- “A” – Represents “Aperture Priority”, NOT “Automatic”. This controls how large or small the aperture will be. Aperture controls how sharp or blurry a background will appear. If you’re creating a portrait, you want the background to be somewhat blurry (or “soft”) to draw attention to the subject matter. However, if you’re visiting the Grand Canyon, you don’t want blur you want the entire image, from the foreground to the background, to be sharp. In that case, you would select a smaller aperture of F11 or F22. The number of feet in focus is referred to as “Depth of Field”. Dial your camera to “A” and practice changing the F-stops. Sometimes, you will not see the “F”, but only the number following it. In this function, you control the aperture, but the camera will choose the corresponding shutter to achieve a proper exposure. Just a note to clarify that zooming out or in with a zoom lens can also increase or decrease depth of field respectively.

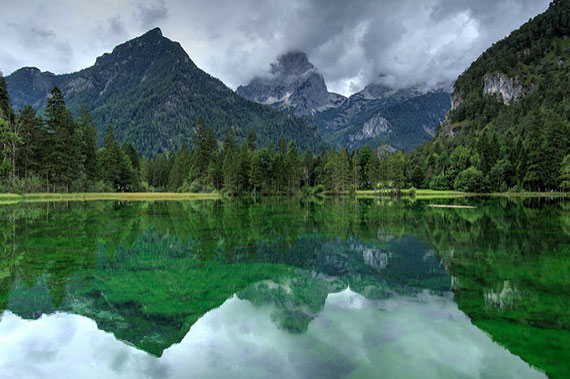
Photo by Christine und David Schmitt; ISO 100, f/16.0, 1/10-second exposure.
- “M” – Represents “Manual” mode. Manual means the camera is handing over complete control of the exposure to you. This means you control the aperture AND shutter. This is a function that can be extremely dangerous for the average person and is usually reserved for professionals. The only way for you to receive information as to the proper exposure settings (aperture and shutter) for your lighting situation is to have a separate, hand-held meter, independent from your camera. This meter will display which shutter and aperture you need to use. Professionals can use this mode because they have a separate meter packed among their equipment.
- Green Camera Symbol (Auto) – Represents “Automatic” mode. Automatic means the camera is in complete control of the exposure. It will choose whatever aperture and shutter it pleases and you’re stuck with the results – good or bad. As you now know, handing complete control over to the camera is not always the best choice. If you know very little about photography but have still recorded some great images in “Automatic”, the honest truth is you were probably lucky. It was a luck of the draw and you were pleased with the aperture and shutter speed the camera chose for you. The reason you’re sometimes unhappy with your images is because you are unhappy with the settings your camera chose. This is why people who are serious about their photography must challenge themselves to understand and use other functions. By the way, “Automatic” also doesn’t allow you to control your pop up flash unit. The camera will pop it up at any and all times it sees fit – even when you don’t want it to. Basically, in this mode, the camera locks you out of all the camera’s other function buttons.
- “P” – Represents “Program” mode – think of it as Automatic Plus. Program means that the aperture and shutter are still on automatic, but you now have access to the camera’s other function buttons such as ISO (the old ASA) “exposure compensation”, “exposure lock”, “auto-focus lock”, and others that Automatic mode didn’t allow.
- A Circle with a Lightning Bolt Slashed – Dialing in this function tells the camera that you want to be on Automatic mode, but want to suppress the flash from firing. This is a great way to disable the flash when you want all your images to be exposed with only natural light.
- Scene – “Scene” mode is a collection of several other conditions (baby, party, sunset, candlelight, beach/snow, silhouette, etc.) that are located in the menu. They placed the others in the menu because they couldn’t fit them all on the wheel.
- Lady in a Hat – This symbol represents “Portrait” mode. This will enlarge your aperture to soften your background to make your subject pop.
- Mountain – This is “Landscape” mode. It will choose a smaller aperture to increase the range of what you’ll see in focus. Do you remember the term? Depth of field. It will increase your depth of field so most everything in your image will be in focus. In landscape photography, everything in the scene needs to be sharply in focus.
- Sport – The “Sport” mode will increase your shutter speed to freeze action so your son’s arm is not as blurry when he swings his bat. If it’s still not sharp, go to “S” and increase the speed.
- Child – This function will speed up the shutter speed because children move quickly. This is similar to “Sport”, however, “Sport” has a much higher shutter speed.
- Macro – “Macro” makes adjustments for close up photography for flowers, details, etc.
- Night – “Night” mode slows your shutter down to bring out the details of a dark background. Remember, once your shutter slows down, blurriness can result. This is limited if you use a flash on your subject and I suggest a tripod with any night photography.
Now that you understand your camera’s function wheel, you will be more confident in your photography and achieve the exact results you’re looking for!
About the Author:
Betsy Snow (betsysnowcom) is a 17-year Photographic Artist who has won local, state and national awards for her work. In 2001, she earned the distinguished Florida Degree of Photographic Excellence.
Like This Article?
Don't Miss The Next One!
Join over 100,000 photographers of all experience levels who receive our free photography tips and articles to stay current:


sick pic love the pic :)
Not the best writing. Some mode explanations include descriptions of their most common icons, some don’t. And “night mode”–my D60 takes that to mean “use the flash”–even though most of my night photography takes place at distances the flash won’t reach.
it would have been better if the picture icos were depicted for clarity
im just learning about cameras :)
I love the macro feature. It helps to capture minor details very clearly.
I have a canon EOS 7D. Before that I used a 20D.
1. P mode: While the camera does set the aperture and shutter speed, they can be changed by turning the Main Dial.
2. For Canon Cameras the Shutter mode is designated by Tv (time value), not S.
Good article. It would be worth it to give the Canon(Sony, Olympus) equivalents as well.