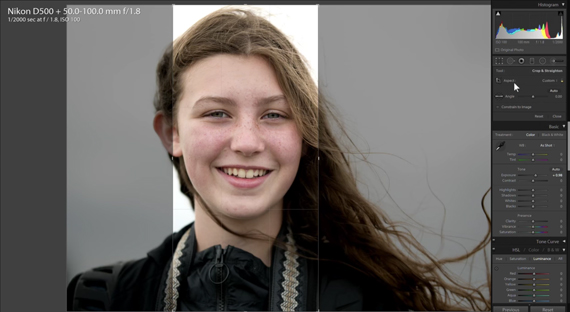
One of the first things that new photographers find when they try to take portraits against a sky or other bright background is that their subjects come out seriously underexposed. If this is you, you’ll probably find the following tip from photographer Tony Northrup super helpful:

Many DSLRs have excellent autoexposure modes, but one place they’re seriously challenged is in giving you a well-exposed subject against a bright background. You can fix this, of course, by using a flash or other light modifiers and/or by shooting in manual mode. But if you’re comfortable shooting on auto or just want to take a quick snap, learning how to look at the histogram and make quick changes in Lightroom can be quite helpful.
One key thing to remember is that our eyes go first to the bright part of the image. For most portraits that means that the subject’s face should be well-lit (either by natural light or with the aid of modifiers), particularly when compared with other parts of the photo. Now obviously not all portraits are going to be the same; if you’re working with dramatic light and shadow you can throw all of this out the window. But in general, making sure your subject’s exposure lands in the right third of the histogram is a good rule of thumb. And checking it through the crop tool in Lightroom is an excellent shortcut.
If you’re an experienced Lightroom user, you can make more precise exposure adjustments by using the radial filter and bumping up the levels on the face alone; that way there’s no need to crop or to blow out the sky. Just remember to apply enough feathering to the radial edge to make it blend in well. And of course, for those finer adjustments, exporting to Photoshop is always an option. But if you don’t mind blown out highlights and just want to make a quick fix, there are certainly worse ways to go about it.
Like This Article?
Don't Miss The Next One!
Join over 100,000 photographers of all experience levels who receive our free photography tips and articles to stay current:


Leave a Reply