Most digital cameras share common features like exposure modes and focus settings. Various metering modes are found in all DSLRs. They offer different ways of reading the light values coming into a camera and determining the proper exposure. Metering mode can also be defined as “the area in the viewfinder that is metered.”

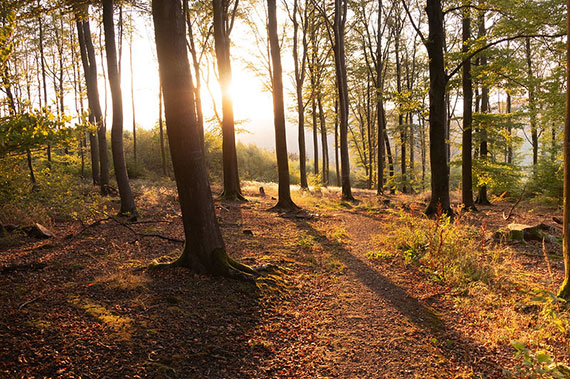
Photo by Bernd Thaller; ISO 800, f/13.0, 1/160-second exposure.
In the early photography days the TTL (through-the-lens) method was used. Today’s digital cameras use much more refined methods of evaluating the light.
How a Camera Evaluates Exposure
- A digital camera first gathers certain information to use for its exposure decision. Light conditions that affect the frame play the major role for this decision.
- Then the camera enters the evaluation process. Using the gathered information and certain rules, the camera calculates the exposure value.
(The range of light is measured with low numbers being darker, i.e., exposure value 1, with high numbers assigned to the lightest i.e., exposure value 12.)
Metering Modes
Center-Weighted, Evaluative, Spot and Multi-Area are among the different metering modes.
All cameras have some form of Center-Weighted and Evaluative modes. Some DSLRs also include Spot and Multi-Area modes.
Center-Weighted metering takes its measurement from the center of the viewfinder. This mode gets an accurate reading from a critical point and works well when there is an even range of light values.
Center-Weighted Average is useful when you want to emphasize your subject since the exposure is averaged around the center.
Certain cameras offer a Center-Weighted Evaluative option where the entire image is considered. However, when calculating exposure, the middle point of the image still gets more attention.
Evaluative Metering works by dividing the image into sections. The number of these segments varies from one camera to the next. The meter reads the light value coming in from each of these segments and calculates the best exposure.
Spot Metering measures a spot or very small area of the image to base the exposure on. Spot metering is useful when the surrounding area is either darker or lighter than the subject itself. This method is preferred when working in difficult lighting situations and it works well when you have a specific area of the image that is critical for exposure.
Multi Area provides an additional type of metering which measures light values around the detail areas of your subjects. This type of metering delivers better lighting results.
Metering Tips for Vivid Captures
- Bright Areas and White Objects. Point the Spot Metering at the brightest area of the scene. Check the suggested exposure and lower the aperture setting by 1. This technique is suitable when shooting a bright sandy beach, a sunset, or a snowy scene.
- Dark Areas. Point the Spot Metering at the darkest area. Check the suggested exposure and increase the aperture setting by 1. This technique will get correct tones.
- Mid-Grey Areas. To capture details of a mid-gray area, set the camera for the “suggested exposure.”

Photo by picccus; ISO 100, f/4.0, 1/60-second exposure.
Using various metering modes allows you to understand how the camera evaluates light in various metering modes. Experimenting with different metering modes will allow you to capture vivid colors and will add to your photography skills.
About the Author:
Article written by Zoe Shaw from digitalphotoworks. She is a computer programmer and graphic designer.
Like This Article?
Don't Miss The Next One!
Join over 100,000 photographers of all experience levels who receive our free photography tips and articles to stay current:


Hi.
Your advice to decrease exposure for bright scenes and increase exposure for dark ones is opposite to what I have always done. The camera will see a snow scene as “too much light, let’s reduce exposure”. That’s why the snow will appear gray in the picture unless the photographer compensates for this increasing the exposure determined by the camera. And viceversa for dark scenes.
Regards.
Preety useful tip. Many thanks!