Photographing landscapes is one of the most pleasurable kinds of photography. Not only do you have the chance to take beautiful pictures for your friends or office, but you can produce canvases, large prints, and even presents for people. How to take good landscapes depends on a few very significant things. The light you shoot in and your lens are the two primary features that generate stunning landscape photos.

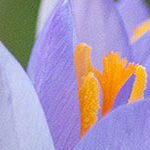
Photo by Decaseconds; ISO 100, f/7.1, 1/25-second exposure.
Two Ways to Take Better Landscape Pictures
First, before I go into detail about these two techniques, let’s look at how to take photos of landscapes. You will need a digital camera that is able to be attached to a sturdy tripod. Then of course you need a tripod. A tripod is what provides you very sharp and clear images. We use a tripod for landscape scenes because we would like to be able to hold the camera free from camera movement. Having a camera that is completely at a standstill allows us to get tack sharp images in many different kinds of daylight.
A shutter release cable is one more clever tool that is often a huge part of working out your landscape photography techniques. A shutter release cable is a little cable with a button at one end. You can join the cable into your digital camera and activate the shutter, simply by pressing down a push button on the end of the remote cable. It will mean that you do not have to come into contact with your camera whatsoever. This increases your chance of getting even sharper photos.
Lenses for Photographing Landscapes
Now that you have your digital camera, sturdy tripod, and remote shutter cord remote shutter cable, what do we do now? Now we come to our lens. There are many different types of lenses for photographing landscapes. It can be hard to choose one if you have not felt skilled photographing landscapes before. One of the most excellent and sharpest lenses is called a prime lens. This means it does not zoom out and in. It isn’t able to. It remains at an unchanging focal length. As a consequence of this immobility, your panorama photos turn out to be sharper and clearer than if you used a zoom lens.

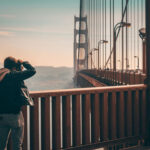
Photo by Marina del Castell; ISO 200, f/6.3, 1/1000-second exposure.
If you want to take pictures of a big, extensive look to your landscape images, then I suggest exploring at your camera manufacturer’s wide angle and ultra wide angle lenses. A wide angle lens is a focal length of about 24mm to 40mm. An ultra wide angle lens is even wider and can be about 14mm-17mm. There are a lot of lenses to select.
Camera Settings For Landscape Photography
There is never any ideal camera setting for a landscape shot. Though there are some accepted rules to create landscapes. To begin with the aim of landscape photography is to create outstanding, clear images with beautiful light. Before we get into light, I would like to clarify that a smaller f-stop is usually what landscape photographers photograph at. A lesser f stop, such as f/22, is what is regarded as an ideal f-stop for landscapes. This is purely because it helps our camera to focus suitably into the distance. If you are shooting at a medium distance of ten to twenty meters away, f/13 or higher works absolutely fine too. You will naturally have to take your lighting into consideration.
What about shutter speed? How fast or slow does that have to be. Since you have a tripod and shutter cable, your shutter is not one of the major important factors that take precedent in your landscape photography. As long as you have your shutter on a speed that won’t blur due to wind, then chose a medium speed.
When I shoot landscapes in the morning, such as 7am when the light is breaking through, I might chose F16 and 1/125 of a second. I will chose an ISO of between 100 and 400. My ISO depends on the light of course. The higher the ISO the more your color will be affected.

Photo by Giuseppe Milo; ISO 200, f/10.0, 1/500-second exposure.
The Perfect Lighting for Your Landscape Photography
I have to come clean. I am surprised there is not more written on lighting for landscape photography because it is incredibly central. I’ve chose to write about it last because I want to focus your awareness on it. I want it to stay with you the most. It truly is the most important aspect of landscape shooting.
The reason why a landscape photo looks so vibrant and beautiful is because of the lighting. Without excellent lighting a landscape photo can look dull and lacking in interest. And no amount of cool gear will fix this dilemma.
The greatest time of day to take pictures of your landscape scene is in the early morning or late afternoon. This gentle light is called sweet light. You will find that the light is soft and gently colorful. At these times of day the light, hues and tones give your scene a totally different look to the heart of the day. Shooting in the mid summer sunlight can create unwanted shadows, washed out colors and a general lack of depth. Shooting in a gentle light gives us back those soft colors, muted tones and gentle skies. There are generally no tough and horrible shadows ruining our landscapes.
Landscape Photography Editing Techniques
Once you have your fixed lens, camera set up on your tripod, small aperture and best lighting you can fire off a whole sequence of images to your hearts content! I know I certainly do. Once you have created your beautiful landscape shot you can then take it home for editing. Finding the right photo editing techniques for landscapes isn’t that tricky. You must first know what you are aiming to attain. Some of us adore turning a landscape photo into a monochrome, sepia, or split tone scene. Others love to keep the soft, muted colors that mornings can offer. Some of us love to create different effects altogether to add more drama and impact to produce an almost apocalyptic look to our landscape photos.

Photo by Christian Ronnel; ISO 100, f/8.0, 1/4-second exposure.
The main thing is to keep your shots sharp, broad and vibrant. You may have to enhance the sharpness a little using the smart sharpen tool in Photoshop. For Lightroom fans, open up the “Detail” panel and boost the sharpening, radius and detail sliders to the right.
Increasing the color vibrancy can do wonders for your landscape photo. You will observe that nearly all landscapes hold extra ordinary color. That is as a result of increase in particular colors throughout the image. It is also due to a broad increase in color vibrancy right through the whole photo. Don’t amplify the color too much; you don’t want dark greens to look fluorescent green or pastel pinks of wildflowers to look fuchsia. It will just look out of place. Keep the colors sincere looking as possible, but just increase the presence of color.
High Dynamic Range
If you have trouble with your light then HDR is just the thing. Shadows can sometimes be too dark and highlights can be overexposed. Then try HDR. This “blending” is a professional landscape editing technique that can really rescue your photos. You take 3 different photos. The first is two stops under exposed. The second is perfectly exposed and the third is two stops over exposed. You can then create one single photo which is a blend of all three—bring out the best from all of them. This will bring about natural highlights to your shadows and reduce your highlights to a more natural looking appearance.
Landscape Photography Ideas
Depending on where you live, you may have many opportunities. In case you are stuck for ideas then I have some suggestions for you to try. A beach, a large waterfall, a freeway from a bird’s eye vision, a cityscape at dusk, a long open highway, mountain range with hanging mist, a grassland with flowers and even a paddock with livestock grazing in the background. You can see that there are many different types of landscapes to chose from. Just open your mind and your world will change. You’ll see things you never saw before. That’s what happens with photography; your life chances.

Photo by Wolfgang Staudt; ISO 200, f/10.0, 1/400-second exposure.
Taking photos of landscapes relies on soft and beautiful lighting, a sharp lens and clarity. You don’t have to have a costly digital camera to take stunning landscape photos. You can use the suggestions I have given you in this article.
About the Author:
Amy Renfrey writes for DigitalPhotographySuccess. She is a professional photographer and photography teacher. She shows you how to take the most breathtaking, brilliant, and incredibly stunning photos every single time you press the shutter button, even if you know nothing about photography and have never used a digital camera before.
Like This Article?
Don't Miss The Next One!
Join over 100,000 photographers of all experience levels who receive our free photography tips and articles to stay current:


Shooting scenery in Monument Valley , NEVER ends. With the skies ever changing , and the sun “changing the scene” by the hour. Leave your camera on a tripod and shoot at 8:00 am. Cover the camera with a cloth due to heat or cold, then reshoot the same scene at 10:00 am, then 12:00 pm and so forth. Each scene will “change” due to the cloud formations , the shadowing , and the different sun angles.
Zion is a must. There is the difficulty of the white top mountains and the different degrees of dark as you view the mountain from top to bottom. Plays havoc with the light meter. Split N.D. filter and circular polarizer are MUST haves here.
All in all, FUN to Shoot.