One of the most accurate and powerful ways to take meter readings of light through the lens to determine the dynamic range of a scene is spot metering. It can help you produce a correct exposure every single time you press the shutter release button.
If you’ve struggled to produce photographs that look right in the shadow, midtone and highlight regions then this step-by-step guide can help you get things right.

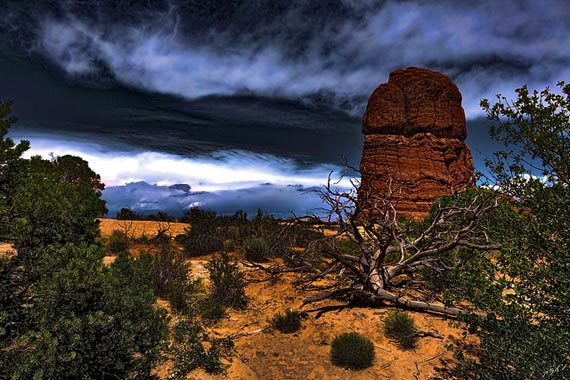
Photo by Anders Jorgensen; ISO 100, f/2.8, 1/160-second exposure.
First, let me clear a misunderstanding about dynamic range which lies among many photographers. Dynamic range in photography is the difference in brightness from the lightest highlights to the darkest shadows. Let’s say you were shooting a sunset scene where the sky was lit up bright by the sun and the foreground was rendered dark because of its distance from the sun and the low altitude of the sun itself at that time of day. Such scenes have dynamic ranges of several stops.
Photographers spend a lot of time trying to figure out the dynamic range of their digital cameras. This is the wrong line of thought and is completely irrelevant. Think about it. What good is a camera whose dynamic range is nine stops or nine exposure values when the scene’s dynamic range is 15EV. In such instances, you can’t possibly capture all the light from the lightest lights to the darkest darks using this camera. You will have to use either a graduated neutral density filter or take two or even three exposures and combine them digitally using software to create a high dynamic range (HDR) image.
So how can you effectively take meter readings through the lens using your camera’s spot meter?
It’s not very difficult at all. In fact, once you know how to place the tones in your scene in the right place using your exposure level indicator, taking the two or three required exposures is a breeze. Or if you are going to use a grad filter, the spot meter can help you calculate your exposure values for the foreground and background to determine which grad filter you’ll need. Here’s how to do it right, step-by-step.

Photo by Alan Eng; ISO 125, f/5.6, 1/1000-second exposure.
How to Use Your Camera’s Spot Meter
1. Set your camera ISO and aperture value—the lowest possible ISO and an aperture of f/16 or f/22 would be a great choice for a landscape scene.
2. Set your camera’s Mode Dial to the Manual Mode “M”.
3. Set your metering mode to spot metering.
4. Now have a look at your foreground. Ask yourself these questions: Is it completely dark? Or just slightly dark? Does it have varying tones of darkness? How brighter do you want it to be so that its details emerge in your final image?
5. Having completed step 4, I generally point the center spot that I see in my viewfinder to cover a dark area in the foreground and move the exposure level indicator to +2/3EV. I then make a note of the shutter speed. Let’s say it is 1/2 a second.
6. Next, observe your background. In this case, it is the sky. Now ask yourself these questions. How bright is the sky? Is it really bright or is it slightly bright? Does it have varying tones of lightness? Do I want the sky to appear any brighter than it is? Do I want to darken it up slightly because there are some awfully bright highlights in it? When metering the sky, look for a midtone region that you can cover with your center spot. A mid-blue or a mid-grey cloud would be good. If there isn’t one, then look for a bright area that you think should lie at +1EV on your exposure level indicator. Point the center spot there and move your mode dial until your exposure level indicator is at +1EV. Record your shutter speed. Let’s say it is 1/1000 seconds.

Photo by Carlos M. M.; ISO 100, f/13, 1/125-second exposure.
7. You now have your two shutter speeds for two separate exposures that you can combine later. Frame your scene with your camera on your tripod. Take one shot at 1/1000 seconds and one at 1/2 seconds. Be careful not to nudge the camera or tripod.
8. Have a look at both images to see if you are happy with the foreground and background detail. Check the histograms to see if there is any clipping on either end. Use a slower than 1/2 second shutter speed to lighten up the foreground even more and faster than 1/1000 second speed to bring in the detail from the lightest highlights.
This is the best way to use your spot meter through the lens. Getting landscape exposures right every time is about getting the right balance between tones in the sky and the foreground. The step-by-step method will give you a head start.
About the Author:
Written by Cee Dhinjan, a photography enthusiast who enjoys educating others.
Like This Article?
Don't Miss The Next One!
Join over 100,000 photographers of all experience levels who receive our free photography tips and articles to stay current:


Leave a Reply