Most photographers who are serious about improving their portrait taking skills have realized that a beautiful background can greatly enhance their photographs.
Muslins are a very popular choice among professionals. However, they can get very costly at several hundred dollars each. For the professional who is well established, this may not seem too much, but for the hobbyist, this may be a stretch.
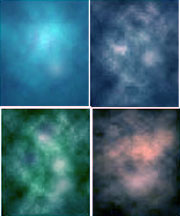
A less costly alternative is a digital background. With a digital background, one can get the look and feel of a professional looking portrait without the additional cost of muslin.
Many Photography websites also sell digital backgrounds on cd. In some cases…as low as $15.00 dollars for an assorted collection. As with anything else…you usually get what you pay for. Some of these pre-made digital backgrounds are not worth the cd they’re printed on, but some of them are very beautifully made. Even so, you may be wondering how YOU can make your very own digital background. That being said, the following information will help guide you along the way.
Okay, let’s create a digital backdrop using Adobe Elements 2.0. We will create an 8×10 300dpi (dpi = dots per inch or ppi = pixels per inch) digital backdrop. For printing purposes, 300dpi is strongly recommended for a high quality print. This will also create a large file approximately 20.6megs.
Having a fast processor (Pentium 4 or Athlon XP) and at least 256megs of ram will definitely help. Also having your screen resolution on your monitor set to its highest setting 24 or 32bit will give the best results.
Okay let’s begin! If you haven’t already opened Photoshop Elements, do so now.
1. Click on File
2. Make a copy of the background layer you just created by pressing Control-J on your keyboard. If you look at the bottom right corner of your monitor, you should see an exact copy of your background layer named layer 1.
3. Select the “foreground” color for your background by clicking on the foreground square on your toolbar… the black one. (Bottom left)
4. The Color Picker window should now be open. Select a light red by clicking on the top right corner of the color palette. Click ok.
5. Now select the “background” color by clicking on the background square on your toolbar… the white one. (Bottom right)
6. The Color Picker window should open again. Select a darker red by clicking halfway below the lighter red you previously chose. Click ok.
7. Now comes the fun part! Let’s put some clouds in there. On the top of your screen, click on Filter
8. First, make sure that layer 1 is not locked! Look at your layers palette on the bottom right of your screen. Do you see the little black “lock” icon? Make sure that the little white square to the left is NOT checked!
9. Okay, now press “m” on your keyboard. At the top left corner of your backdrop, click and drag your mouse to create a 2×3 inch square. If you do not see the ruler along side your backdrop, press “control-r” on your keyboard.
10. Press “v” on your keyboard. Your selection should now have little handles on all sides that you can click on to pull to any size you want. If you do not see any handles, click on “Show Bounding Box” at the top.
11. Click on the lower right handle in the corner and drag and stretch it to the bottom right corner of your backdrop.
12. Double click anywhere on the red backdrop to apply the resizing. Now press “L” on your keyboard then “control-d”.
Okay, now you should have a beautiful looking backdrop ready to use, but wait, there is still more we can do to take it to another level. You will be simply amazed at the results you will be getting in the next few steps. You may have noticed that many types of muslins on the market have painted on them what’s known, as a “hot spot”.
What is a hot spot? A hot spot is a circular area near the center of the backdrop that is lighter in color. Why is this there? It allows the subject to stand out and creates a vignette at the borders. This will greatly enhance your backdrop. Are you ready? Okay, let’s do it!
13. On the top, click on Filter-Render-Lighting Effects. Select “Omni” for your “Light Type” and move the slider for your intensity to 25. Now click on the middle handle in the circle and raise the circle just above the halfway point to where the person’s head will appear. Click ok.
Now you should have an amazing looking backdrop! Fabian Barajas is author of several Photoshop ebook and video tutorials. His website which includes samples of his work is http://www.photoshopnewbies.com
Like This Article?
Don't Miss The Next One!
Join over 100,000 photographers of all experience levels who receive our free photography tips and articles to stay current:


Have DVD from Fabian Barajas when he sold from photoshopnewbies.com. Have used them extensively. Does Fabian have another website where I can see his latest tutorials. Please email info available.