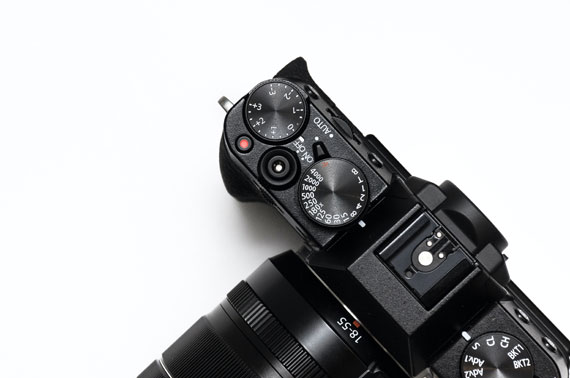
Why is the exposure triangle so important to creative photography? Well, without it there is no creativity to your photography which makes it really important. Oh, you don’t know what the exposure triangle is? It’s your three most fundamental keys in photography: aperture, shutter speed, and ISO, which together control how much light reaches your sensor.

Photo captured by Math
In order to understand the exposure we need to look at each of them individually. But before we do that, a little something on the side. On the mode dial of your camera where you see the symbols A(v) S M P or Adep there is also a little green square which represents automatic. This is a no-no if you want to become a creative photographer. Automatic means that the camera chooses the setting for you and you just point and shoot. Those symbols represent what we call the creative modes. The other little pictures are the specialized automatic modes, which we don’t use either.
So let’s take a look at the three modes of the exposure triangle.
1. Aperture
Aperture controls how much light reaches the sensor. To me, the aperture setting is the most important of the three because it allows you to control depth of field, or as I like to call it, depth of focus. This allows you to set how much of your image will be in focus.

photo by Honza Chylík
A shallow depth of field is when, in a portrait for example, the background is beautifully blurred out with only the person’s face in focus. This gives a lovely image image as the background clutter is blurred into an abstract milky kaleidoscope of soft color. In order to achieve this, a small aperture number or f-stop is used.
Whether the aperture is large or small is immaterial; what you need to remember is that a small f-stop (such as f/2.8) gives you a small or shallow depth of focus (i.e., only a small portion of the image is in focus as you see in a portrait of a person).
To achieve a large depth of focus you do the opposite by using a large f-stop number (such as f/22). A large portion of the image is in focus as you often see in a landscape photo. Aperture is important with creative photography as it allows you to control what is in focus or out of focus. What you also need to know about aperture numbers or f-stops is that a small number lets in a lot of light and a big number lets in a little light. Remember this. Most times I will shoot on Aperture Priority mode—A (Nikon) or Av (Canon)—as this gives me control of the aperture while the camera selects the shutter speed.
2. Shutter Speed
Shutter speed controls the length of time the shutter is open. This allows you to control the sharpness of the image. An action photo needs a fast shutter speed in order to freeze the shot. But if you want it blurred to simulate speed then a slower speed will achieve that level of creativity.

photo by Dave Newman (1/6 of a second)
When shooting on Shutter Priority mode (S) the camera will control the aperture while you choose the shutter speed. What you need to remember is that a fast shutter speed (e.g., 1/125 to 1/1000 of a second) lets in a little light and a slow speed lets in a lot of light.
3. ISO
This is really simple as it controls the sensitivity of the sensor and is a last resort when you can’t let in sufficient light with the aperture or shutter speed settings. There are times when you can’t select use a wider aperture as this will make the depth of field to shallow, so it’s necessary to increase the ISO level. The same goes for the shutter speed. The downside is that the higher the ISO the more noisy the image.

photo by Iouri Goussev (ISO 3200)
Now, how does the exposure triangle work? There are times when you want to take a shot of a wind surfer twisting through the air. This means you need a fairly fast shutter speed. Because he is moving a shallow depth of field won’t work as part the surfer may be out of focus so you need a large f-stop number. If you remember, a large f-stop number means less light and a fast shutter speed also means less light. So you have a problem.
The important thing here is that you want a fast shutter speed to freeze the fast action. You can do one of three things. Slow down the shutter speed which won’t work as you need to freeze the frame. Secondly, you can increase the amount of light by choosing a smaller f-stop number. This won’t work as only a small portion of the image will be in focus. The only thing left to is to increase the sensitivity of the sensor to the available light by increasing the ISO level. This lightens the image and allows your fast shutter speed and large depth of field.
The way exposure triangle works is that it if you change one of the three settings it will affect the others. I must emphasize here that the exposure triangle is most effective when using the manual mode so you have full control of all three settings. By being aware of these three aspects of your photography you will be able to increase your creativity. Happy shooting!
About the Author
Wayne Turner has been teaching photography for 25 years and has written three books on photography. He has produced 21 Steps to Perfect Photos, a program of learner-based training using outcomes based education.
Like This Article?
Don't Miss The Next One!
Join over 100,000 photographers of all experience levels who receive our free photography tips and articles to stay current:


The one thing that the writer forgot to mentioned is this. In the old days of photography, if you only had film with 100 or 200 ISO, you did not have the luxury of just dial more sensitivity to the film. What you did was to learn photography and find out how you can capture images using one ISO sensitivity and not rely on the camera. Of course, people prefer to just get a more expensive camera, one that gets “really good pictures” instead of learning photography.
To each his own.
To Wayne, and the forum admin…
My only agenda is to strive for accuracy in information presented on a forum that, as Wayne said, is “one of learning”. When an author of a post is credentialed as “teaching others for 25 years” the readership is led to believe that he has expertise in his field and that the information being presented is correct. I participate in other forums on photography where a lot of false information is presented as truth because they “saw it on the internet.” Why would you, Wayne, not want to give people correct information? You were corrected by several readers on your incorrect explanation of ISO, and Randy pointed out your error of using depth of field and depth of focus interchangeably. Those points cannot be brushed off as “honest mistakes” as if they were a typo. I believe you have presented those incorrect concepts for many years now.
As I was typing this I saw your response to Randy in which you stated that you know the difference between depth of field and depth of focus, but justify using depth of focus as easier for students to understand. Why not tell your students that some people incorrectly use the terms interchangeably, and then stick with the proper term? That would be like giving 220% education because you presented not only 100% for each term, but you pointed out the difference between the two. Bonus!!!
I have been following PictureCorrect for quite some time and I understand that the articles are not aimed at advanced photographers. But that is all the more reason for presenting correct information that might even have the effect of encouraging keeners to delve deeper into the art and science behind photography. Let’s not start them off on the wrong foot with incorrect terminology and concepts that then have to be corrected, unlearned and then relearned.
I don’t want to make myself look good or more intelligent, or be disparaging. I simply want to see a spade called a spade, and not a shovel. We all know how Wikipedia is managed, and while it is not perfect it does ultimately get closer to the truth as people correct and refine the information. I know that the “falsehoods” presented in Wayne’s article would have had a very short lifetime on Wikipedia had they been submitted there.
So my message to admin is to proofread and validate the material being presented before it gets published. You owe your readership that kind of service.
And Wayne, it is folks like you who have the years of experience and credibility that should be leading the charge of truth and accuracy in education. Don’t stop teaching — you are probably very good at it — but do the 220% thing rather than 50%.
Hi Randy
Thanks for the comment.
I have found that using depth of field and focus interchangeably a real help for students struggling with the concept of depth of field. I have taught a creative photography course for years at a school ( from teenagers to adults). The teacher who teaches the course on basic photography seldom gets the depth of field concept across.
I do know the difference between the two. Unless internet learners are in a different category I would presume the offline students are not unique in their struggles.
Regards
Wayne
I thought of responding to John’s comment but as I read more I realised he had an agenda. I find that people who offer an honest correction a pleasure. But, those who try to make themselves look good or more intelligent by disparaging others don’t deserve a response.
Comments like, “teaching others for 25years”, “lead readers astray” and “falsehoods” are not constructive or engaging and clearly reveal a demeaning attitude.
I would encourage people to ask questions or for clarification. Honest mistakes are made. Let’s keep this forum one of learning and building people up.
Very interesting article on the “Photography Triangle”. I do have a comment on the Author’s use of “Depth of Focus” to mean the same as “Depth of Field”, in the Aperture section.
Depth-of-Field relates to the “subject” being photographed, outside of the camera. Once the subject is in focus, Depth of field is the total distance in front and behind the subject, which is also in sharp focus. Yes, this distance is a function of the aperture used. It also depends on the focal length of the Lens used and the lens-to-subject distance.The closer the “Subject” is to the camera, the smaller the Depth-of-Field.
Depth-Of-Focus, on the other hand, refers to the “Image” of the Object being photographed, as it registers on the receptor, inside the camera. Depth-of-Focus was in more common usage, during the days of fixed lenses combined with moving photo plates. It is however, still a relevant term.
It is the total distance the focusing lens moves (Or the plate, in older cameras), “inside the camera”, to keep the image sharply focused on the film, sensor or plate.
Depth-of-Focus depends on the aperture used, the diameter of the Circle of Confusion, and the distance between the focusing lens and the “Image” registering inside the camera.
Exactly opposite from Depth-of-Field, here the closer the “Subject” is to the camera, the greater the Depth-of-Focus.
Depth-of-Field is completely different from Depth-of-Focus, and these terms should not be used interchangeably.
RANDY.
It is unfortunate when someone who has been teaching photography for 25 years makes the kinds of mistakes presented in this article. Overall the message is good and helpful to the average reader, but there is no need to explain concepts using falsehoods when truths are perfectly fine and just as easy to understand.
Starting with the first paragraph, ISO does NOT control how much light reaches the sensor, unless one invokes the fact that by playing with ISO one is able to make compensating changes in shutter speed and/or aperture. Only these last two parameters control how much light reaches the sensor. Further, there have been a few comments explaining that ISO does NOT change the sensitivity of the sensor, but rather changes the amount of amplification that is applied to the output of the sensor. That is correct.
The author then states “…a little green square which represents automatic. This is a no-no if you want to become a creative photographer.” Creativity is NOT NECESSARILY restricted by Auto mode(s). Understanding what the various modes on your camera do can actually help you be more creative. The PASM modes, particularly M, certainly give you more control, but even P mode can be manipulated using “program shift”. It really comes down to knowing your camera and using ALL of its capabilities/modes when they would be most appropriate; and that includes full Auto and even some of the preset scene modes (“The other little pictures are the specialized automatic modes, which we don’t use either.”). Remember, the photographer is ALWAYS in control, even when selecting to intentionally use a scene mode.
The author then states, “To me, the aperture setting is the most important of the three because it allows you to control depth of field, or as I like to call it, depth of focus.” Depth of field and depth of focus are NOT interchangeable; they mean different things and it is not the authors prerogative to modify the definitions of accepted terminology. From Wikipedia: “The phrase depth of focus is sometimes erroneously used, to refer to the depth of field (DOF), which is the area in front of the lens in acceptable focus, whereas the true meaning of depth of focus refers to the zone behind the lens wherein the film plane or sensor is placed to produce an in focus image.” There was no need to lead readers astray; sticking with “depth of field” would have been correct and sufficient to explain the effect of changing aperture.
I realize that the intent of this article was to present a high-level description of the exposure triangle, but as a photography instructor the author should not make statements that ingrain false concepts in students that he later has to undue when he gets into more depth.
Its amazing what a camera could make you see
Unfortunately the exposure triangle can only be controlled effectively if you have control over aperture and shutter speed. The nearest you can get to achieving this on a point and shoot is by using the head on your controls which is for portrait and gives a shallow depth of field and the other is the landscape which gives you a large depth of field. The little man running gives a fast shutter speed. Besides this there isn’t much you can do with an automatic point and shoot.
Do you have any advise for point-and-shoots that only allow control over ISO but no direct control over A & S? Do you have thought to share on D-Lighting and HDR composite rendering?
Sensor sensitivity is a confusing issue. Let me throw-in my two cents. Think of it this way: a sensor is made up of millions of solar cells (like the ones on our roofs). When light (from our cameras) hit the solar cells they produce an electrical current. The more light the more current. This is fixed by the physical properties of of the solar cells. You (the camera operator) can not change the sensitivity of the solar cells In other words, you can not get more current out of the same amount of light.
What happens is when there is not enough current (light) to produce an adequate.exposure, raising the ISO amplifies the voltage produce by the cell, thus increasing exposure. This is done downstream from sensor and is why more noise is produced as ISO is increased Same anology as film.
Arguing whether the senstivity of the sensor is increased by raising the ISO is moot (or silly). We all know what is meant. If one needs more exposure, increase the ISO which will increase the sensor’s (systems) sensitivity to light.
As you increase the ISO 100-3200 it increases the sensor’s sensitivity to light. It works in basically the same way your aperture when it is opened up wider and lets in more light. When you slow down the shutter speed it does the same thing by allowing more light to reach your sensor. As you adjust one it affects the other two, hence the aperture triangle.
ISO is the sensitivity to light, at least that is how it has always been explained to me and a lot of others over the years. So that is how it affects the sensor sensitivity, unless the guys that have explained it are wrong.
How does changing ISO affects sensor sensitivity? Changing ISO amplifies the light captured by the analogue sensor device. Hence the increased noise levels.