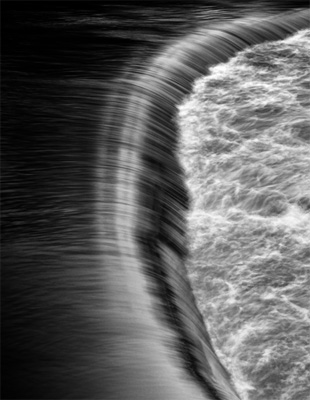
Waterfalls and streams are popular photography subjects because they can easily be made into a soothing digital desktop wallpaper. A common element in many waterfall pictures is the silky smooth appearance of the water.

Photo captured by PictureSocial member Tomas Eriksson
This is not difficult to capture, with the right tools and techniques.
Tripod
Without a tripod, pictures of silky smooth moving water would not be possible. This is because we typically use shutter speeds of 2 seconds or more, which is not possible to hand-hold without getting camera shake. The general rule of thumb for a steady shot without a tripod is the one-over-focal-length rule. If you are using a 24mm lens, the slowest shutter speed you should use is 1/24. This actually means 1/30 which is an actual shutter speed setting. Similarly if you are using a 200mm lens, you should not use any shutter speed lower than 1/200. Of course, if your lens has VR (vibration reduction) or IS (image stabilizer) you can bend this rule by a few stops. Or you have hands as steady as a rock.
Polarizing Filter or ND Filter
Circular polarizing filters are designed to reduce reflections and increase saturation. As a side effect, they also cut down about 1.5 stops of light coming through the lens.
ND filters are neutral density filters, available in different strengths. They act like sunglasses for your lens by cutting down the light coming into the lens.
Both these filters enable the shutter speed to drop to the levels that are needed to create the motion blur in the water. The circular polarizing filter has an added benefit in that it minimizes the reflective wet surfaces on the rocks, and prevents hot spots, giving you a clearer shot.

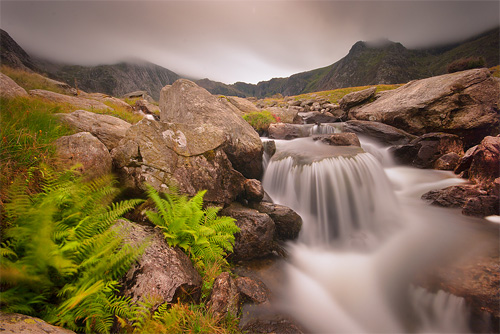
“Ferns and Falls” captured by PictureSocial member Mark Broughton
Remote Release
You can use a remote release to trip the shutter, or take advantage of the self timer. Both methods can be used to enable hands-free operation of the camera when the shutter opens. This is crucial for sharp, shake-free shots. If your DSLR has a mirror lock-up function, use it as it adds another layer of stability by locking up the mirror before the shutter opens, further minimizing vibrations.
Timing and Location
Finally it’s time to use these tools to get the shot. Shooting a time when the sun is not too strong will give you the best chance of slowing down the shutter speed. This is because even at ISO100 and F22, your shutter speed may not reach the required levels if there is too much light. A shutter speed range of 2 seconds to 5 seconds is your target. Shooting in forest cover will also increase the possibility of lower light levels.
Vary your shutter speeds for different moods. There are many other variables to fine-tune, like composition, color balance and foreground interest. So keep on experimenting to get the perfect waterfall shot.

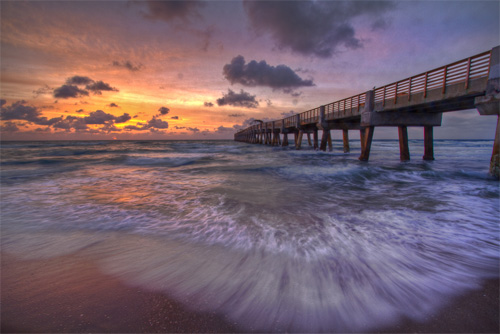
“Tidal Lace” captured by PictureSocial member Debra Vanderlaan
Smoothing Ripples
You can also apply this technique on other water surfaces, like lakes and dams. Ripples on a lake can be smoothed out by using a long exposure. The result is a mirror-like calmness. Reflections on this surface are sometimes rendered as wavy surreal reflections.
About the Author:
Andy Lim (www.simpleslr.info) runs a profitable photography business that spans wedding photography, commercial photography and conducting photography workshops.
Like This Article?
Don't Miss The Next One!
Join over 100,000 photographers of all experience levels who receive our free photography tips and articles to stay current:


I agree 100% with Anne Taylor’s comment. For me this photography “trend” is just cliche photography.
Other samples of cliche photography:
Taking the same-old sunset photos. “Red sky, purple sky, blue sky, red sky, red sky…”
Making B&W artistic nudes.
Changing better-suited color photos to B&W
Photographing people who are less fortunate than you.
Taking only black & white portraits.
Taking Dark and Moody Rembrandt-Style Portrait ……
I absolutely agree with Anne Taylor. Shame on you people.
Thanks alot for tips, will put them into practice in next shoot.
If you ppl don’t like silky waters I suppose you don’t also use Lightroom or Photoshop…BCZ it’s jot realistic ?
I agree 100% with Anne Taylor’s comment. I do not like the “cotton candy” “silky smooth” water photos. It seems that if one doesn’t make their photos look that way they aren’t worth looking at. It is artsy, but not realistic.
What is this fascination with “silky smooth” water? A few photos look wonderful with that effect, but generally I find it ridiculous. Unpolluted water almost never looks “milky” in real life, and when I see it in a photo, it both ruins the beauty of the photo AND makes me very aware of the artifice behind the photo, the fact that someone is using an effect. Okay, I get it–my taste is just not like that of most photographers these days. But, really, I detest this trend.
Using both polarizing and ND filters will also cause vignetting.
Am I wrong or is the optimal shooting range more like 1/2 to 1/8 shutter speed? Not 2 to 5 seconds.
Yes. Just remember that the combination will reduce the light further so a longer exposure will be necessary. When I stack these, I put the polarizer on the outside so I can still rotate it separately.
Generally, is it OK to use both grad filter and circular polarizer together when smoothing down the water surface against a bright sky?