Many photographers run for cover when the outside air temperature dips five or ten degrees below the freezing point, fearing their equipment may malfunction, or worse, their fingers and toes will fall victim to Jack Frost’s wiles. Although these concerns may hold some truth, the reality is that with adequate and thoughtful preparation, the snow-shy landscape photographer has a whole other side of nature to discover during winter—and a beautiful one at that.
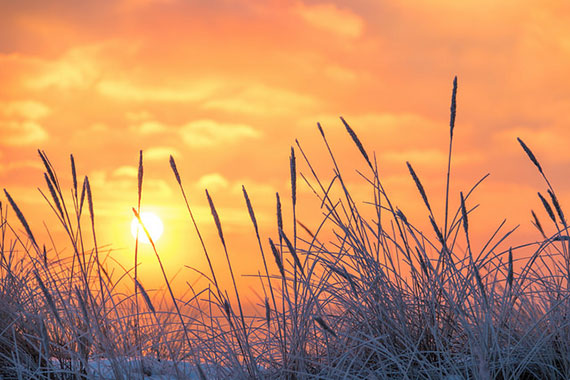
Photo by Susanne Nilsson; ISO 160, f/5.6, 1/160-second exposure.
Crisp winter air emphasizes the beauty of luminous clouds, eerie fog and mist, and that special light only a sunrise can provide. It is said that “success is the random collision of chance, opportunity, and perseverance.” I can claim that this so called off-season time of year provides ample opportunity for just that: the capture of successful images to add to your portfolio.
Now having said all this, I’ve actually been guilty of not exploring the winter wonderland that lies in my own back yard! Even though I’m Canadian, my nose (and my photo gear) have been kept quite warm, at least until recently.
In early winter a few years ago, a friend and photography mentor offered the opportunity to accompany him on a weekend of travel and photography in one of Canada’s most spectacular areas called Bighorn Wild Land in Alberta. The photo opportunities are plentiful in this region, thanks to the grandeur of the Rocky Mountains, waterfalls, lakes, and wildlife. And my friend is a full-time pro who knows the area intimately, so how could I say no?
The experience was fun and educational. Having worked in the outdoors in the wintertime years ago as a surveyor, I knew to dress warm enough so that shooting wasn’t uncomfortable. Don’t get me wrong though, it wasn’t a walk in the park—pre-dawn setup at the shore of Lake Abraham was very difficult due to howling northerly winds. It was bad enough we had to splay the legs of our tripods wide so they wouldn’t topple, so you can imagine how protecting ourselves from wind chill was essential.
Now, before any of you go trudging out into the wild winter in your brand new custom-made mukluks, there are a few tips and tricks I’ve picked up when it comes to clothing and equipment. But even before that, if you’re inexperienced you should start out taking short jaunts from your vehicle; no big hikes your first time out.
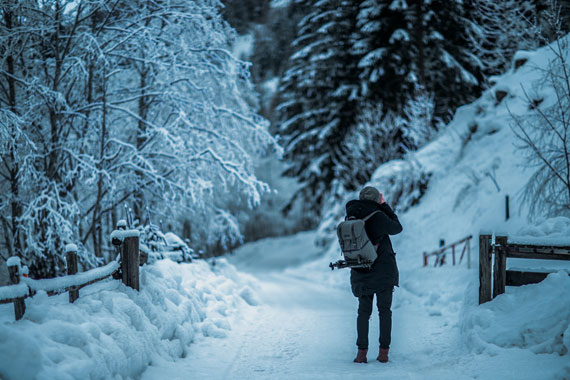
Photo by armin djuhic; ISO 100, f/1.2, 1/4000s, 85mm.
We kept our extremities toasty with chemical hand warmers. These are a godsend when fiddling with your camera’s dials and knobs. It’s a good idea to wear thin gloves for working with your equipment, and heavy mitts with the hand warmers inside to de-frost from time to time. Footwear should be of good hiking quality, fully intended for cold weather. Remember, you may be standing around for a while waiting for the right light. I mistakenly spent a few hours wearing thinner boots and although purchased as “winter footwear”, my estimation of their insulative value was wrong. It’s best to bring a thinner pair of boots for driving, and heavier ones if you plan to be out for more than half an hour. It’s always good to have options! Dress in layers, with something over your head and ears; remember most of your body heat is lost through your head. A balaclava under your warm winter hat will help when it’s really cold.
For the parts between your head and feet, I recommend long underwear, snow pants, a turtle-neck sweater, an insulated sleeveless vest, and a warm coat with a high collar. Down-filled, or anything rated for minus 30 degrees is good. When hiking to reach your destination, unzip your coat and your vest as you warm up.
Camera equipment, for the most part, will function as normal provided it has been professionally lubricated and cleaned, and it isn’t 40 below! Mechanical parts do have environmental limitations; refer to your manual if you’re in doubt. Even a DSLR without its film transport mechanism has motors, solenoids, etc. to actuate the mirror and auto focus. But, you can usually push the limits beyond published specs by keeping the battery warm, which is usually the first thing to affect camera performance. This can be done with an umbilical adapter that plugs into the battery’s compartment, and a wire long enough for storing the battery in your warm clothing. For digital cameras, image storage is limited around minus 13 degrees, even if you have the latest memory card technology.
If your tripod has metal legs, don’t handle them with bare hands as they will extract the heat from your skin, and possibly initiate the onset of frostbite. Keep those mitts handy when moving from place to place. A trick my friend did to “winterize” his tripod was to fasten pipe insulation to the upper part of the legs with cloth hockey tape. This also makes it more comfortable when it rests on your shoulder while traversing from site to site.
Plan your shooting based on the weather forecast. If you haven’t already scouted out some favorite spots, do so with a compass. The sun rises in the south-east in winter, and sets in the south-west. If it’s going to be overcast, waterfalls are great subjects. Other good overcast subjects are ice patterns in frozen lakes and ponds, and babbling brooks with lots of snow and ice formations.
Don’t despair if it’s overcast before sunrise. We were about to give up on an overcast morning but got lucky at daybreak when the sky cracked a bit and the red sun painted gorgeous under-lit clouds and mountain peaks. My friend had the place in mind the day before, so our foreground was already figured out. Good light can appear fast, but disappear just as quickly. If your day is going to be partly cloudy, you’ll be blessed with a killer sunrise photo. Entire books have been written on landscape compositions, but I’ve learned the most magical time to shoot anything can be at sunrise and sunset. The light is fantastic at this time, and more so in winter. Think reflecting pools of water for a foreground—in the right conditions they’ll provide a rising mist that is beautiful when captured during a colorful sunrise.
With the right clothing, planning, and dependable equipment, nature provides us with some magnificent material! I became a fan of winter photography and will continue to enjoy it in the future. Give it a try if you haven’t yet.
About the Author:
James Hutchison is a graduate of the New York Institute of Photography, and a member of the National Association of Photoshop Professionals.
Like This Article?
Don't Miss The Next One!
Join over 100,000 photographers of all experience levels who receive our free photography tips and articles to stay current:



please explain the umbilical cord set up for the battery. I think I need this!
Five to ten below the freezing point would be about 22 degrees maximum. It’s -15 at my house, headed for -20 with high winds during the day. What would you do, if anything, to modify your article for my climate?
Take beef jerky with you. It’s great frozen.
Bring your warm, bulky socks when you buy your winter boots. I once made the mistake of buying boots that were too tight and cut off circulation with my warm socks. I often buy my boots a half size larger than normal. Not only does it allow room for warm socks, and enough room to wiggle your toes, but it also allows room for chemical foot warmers like Toasty Toes or Toe Grabbers – which work for like 6 hours. If you are prone to cold feet, be wary of those hiking socks with compression arch support, it can constrict blood flow to extremities. really
One of the biggest concerns with electronic equipment is humidity and moving the camera from the cold to a warm environment is going to generate a lot of condensation on the camera’s electronics. To avoid that I always carry a big plastic bag with click seal where I put my camera before I move to a warmest place. The condensation happen in the outside of the bag but the camera remains dry, safe and ready to use.
This is AMAZING!!
Great review. Great tips.
For the tripod with metal legs a great solution (I’ve found) is pipe foam insulation and available in every hardware store (especially where hockey tape isn’t available – what is hockey tape? LOL). Simply cut it to size and split it down the middle, and tape it tight over the metal legs to secure it.
Northface make terrific insulated glove with etips, so not only can you operate the camera but you and iPhone/Android happily too without getting frostbite. Other glove solution include fingerless gloves with a nifty mitt cover when you’re looking to warm up again!
Lastly, Adorma are selling awesome plastic camera covers (a few dollars each) which are great for keeping the snow way but you can also pop in a chemical hand warmer in the bag with the camera to keep it’s temperature more normalized, preserving battery duration as a bonus!)
Nice article folks!