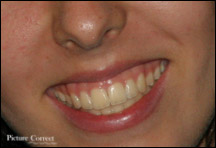
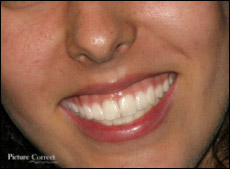
 Photoshop is the dream machine for all photo enhancers and designers. Not only can you make any portrait look perfect, you can do it easily and convincingly… once you know how.
This article will show you, for example, how to whiten teeth and eyes using Photoshop. Some of the more complicated techniques will be over the head for the novice, but you’ll be able to follow most of it. So drag a portrait into whatever Photoshop program you have, and let’s get started:
It’s always a good idea to make a new layer, an exact duplicate, of your photo before you ever start the enhancement process. That way, if you decide you need to undo several steps, you’ll always be able to quickly undo.
Click “Layer” in the horizontal menu bar, click “Duplicate Layer,” then click “Ok.” Onward to the teeth-whitening.
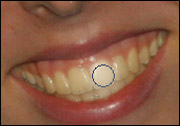
The easiest way to make teeth whiter in a photo is with your Dodge Tool. (Among your tool icons, it’s the 7th down on the right hand column. If you don’t see it there, right click on the icon and you’ll find two hidden choices; one will be your Dodge Tool.)
 On the horizontal Tool Options Bar under the Menu, choose “Midtones” for Range, and 40% for Exposure. Also on the Tool Options Bar, choose the appropriate brush for this particular retouching job.
Use your Magnifying Glass Icon in Tools to zoom in to the area you want to affect. Then run your brush over the teeth you want to whiten several times, slowly, without releasing your mouse.
If you find that the Dodge tool whitened too much, you can either click “Edit,” then “Step Backward,” (to start over), or “Edit”, then “Fade Dodge Tool,” which will allow you to fade the whitening enhancement to your exact preference.
The Dodge tool can also be used to whiten the whites of the eyes, and, in general for anything you want to lighten. Used with discretion, it’s quite a handy tool.

Select the teet with your Lasso tool icon, (second down on the left in your Tools). Then click on Image in your Menu, Adjustments, and Curves. Make sure the Channel box says RGB. Then, with your mouse, pick up the top right-hand corner of the box and drag the line over to the left. You will be able to watch the whitening process as you go.
You can use the Curves tool to change color on any given selection, too.
Photoshop is such a powerful program that it behooves any serious photographer to get familiar with at least the basics.
Happy enhancing!
Master The Basics Of Adobe Photoshop In Under 2 Hours With Easy To Follow Online Photoshop Video Tutorials. Full Details Here: Photoshop Tutorials
Like This Article?
Don't Miss The Next One!
Join over 100,000 photographers of all experience levels who receive our free photography tips and articles to stay current:


For more realistic results, the first step should be the desaturate tool (I use at 100%, then fade accordingly), then if further whitening is needed use the dodge tool. Photoshop retouching frequently goes too far and becomes “photoshopped” rather than real
great!